Shop Settings
Configure every aspect of your store from the comprehensive Shop Settings section.
General Settings
Set up basic store information at Shop Settings > General.
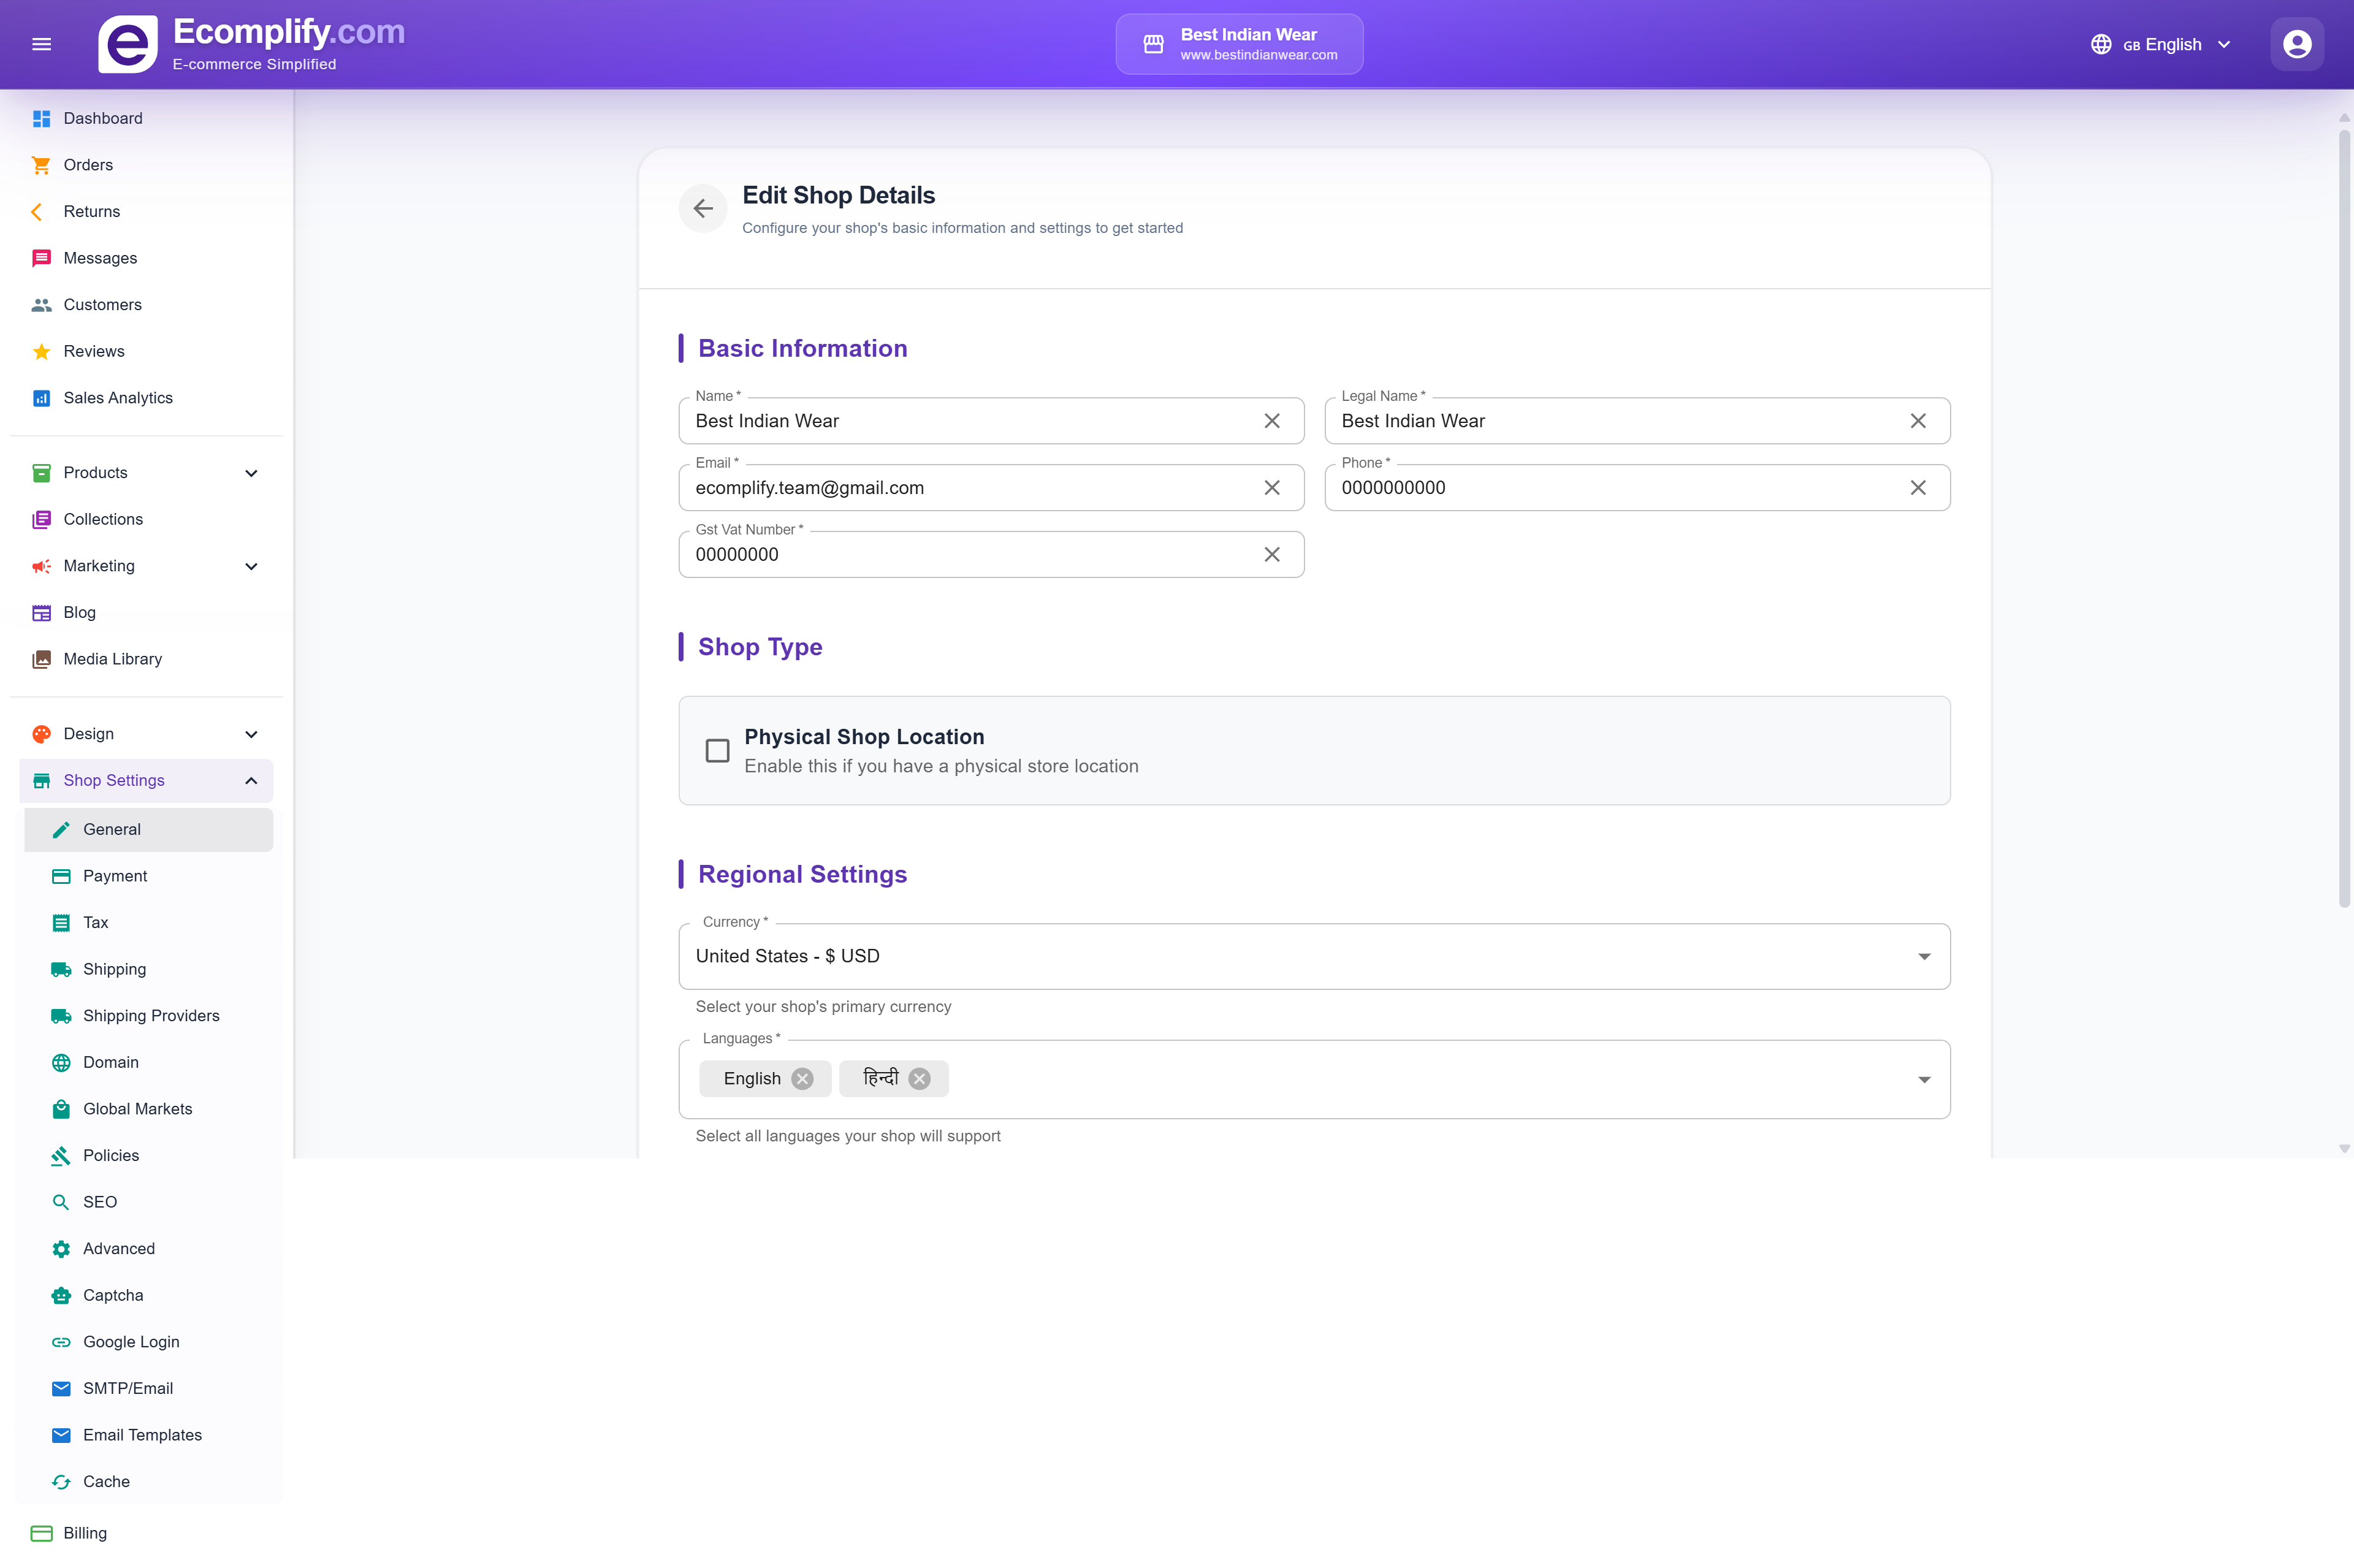
Basic Information
- Name - Your store's display name
- Legal Name - Business legal name
- Email - Store contact email
- Phone - Contact phone number
- GST/VAT Number - Tax registration number
Shop Type
- Physical Shop Location - Enable if you have a brick-and-mortar store
Regional Settings
- Currency - Select your primary currency (USD, INR, EUR, etc.)
- Languages - Add supported languages for your storefront (e.g., English, Hindi)
Payment Gateway
Configure payment methods at Shop Settings > Payment.
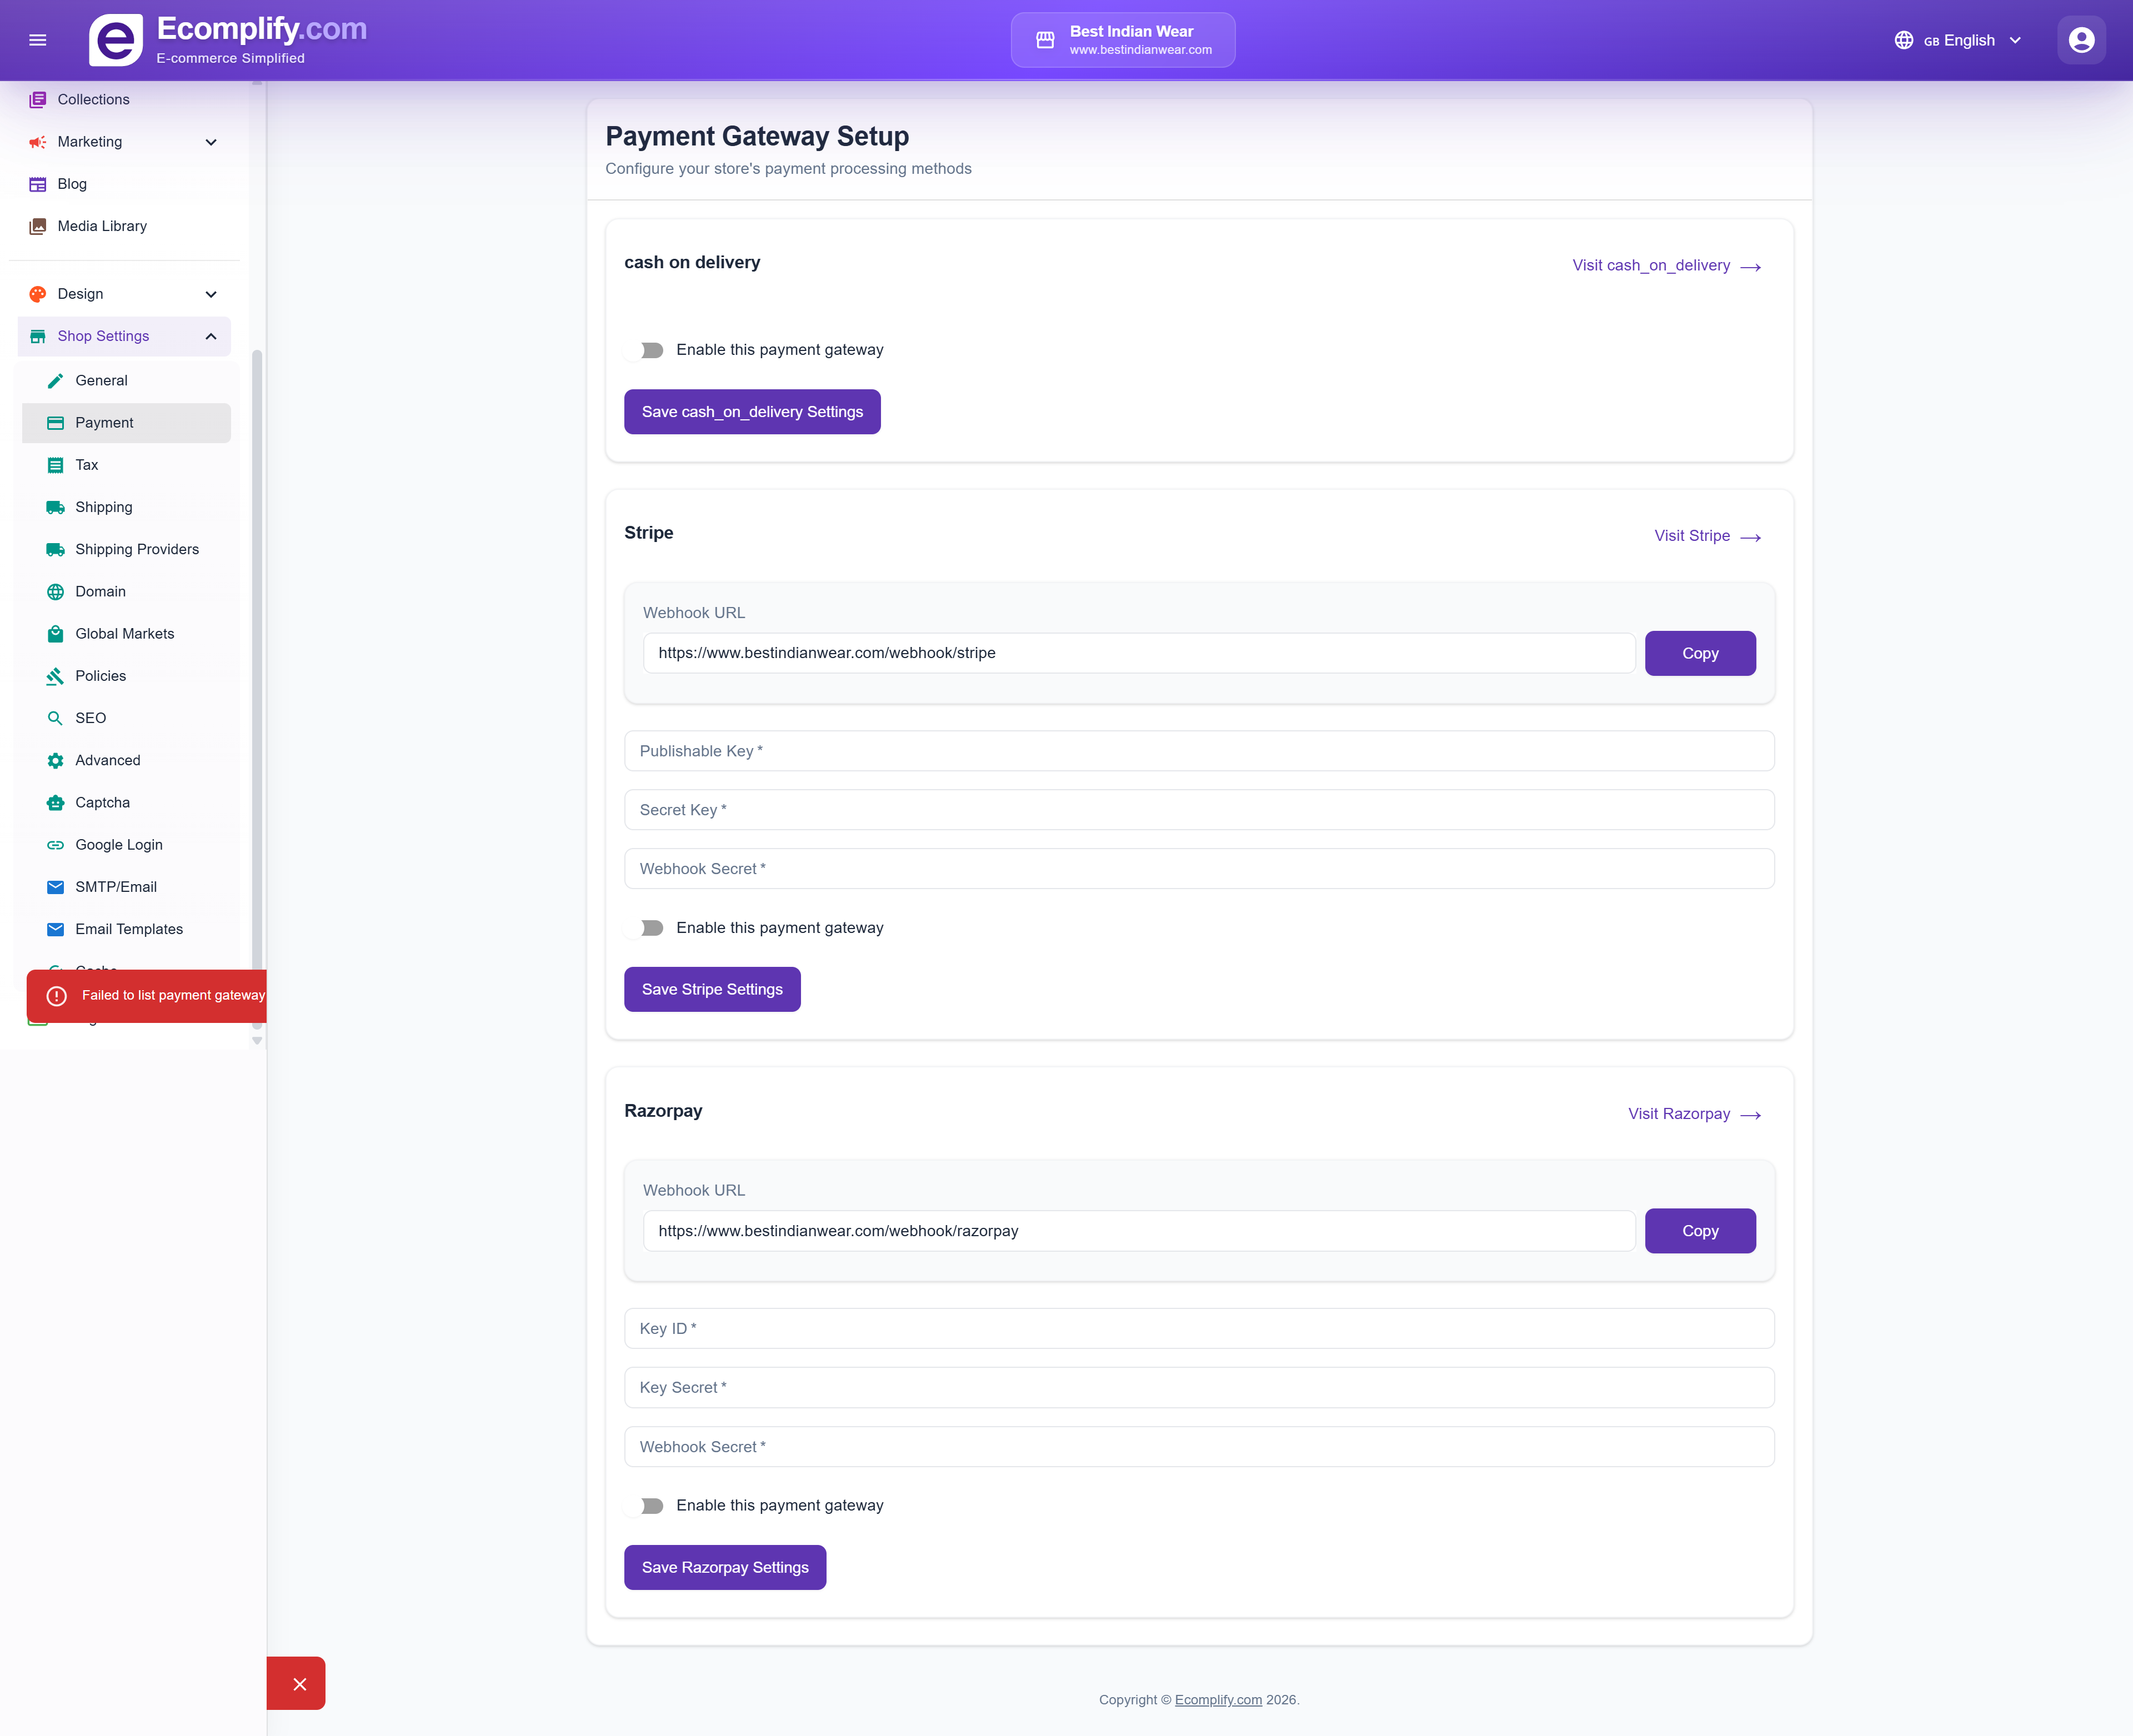
Available Payment Gateways
Cash on Delivery
- Simple toggle to enable/disable COD
- No additional configuration required
Stripe
- Webhook URL - Auto-generated webhook endpoint for Stripe events
- Publishable Key - Your Stripe publishable API key
- Secret Key - Your Stripe secret API key
- Webhook Secret - For verifying Stripe webhook signatures
- Toggle to enable/disable Stripe payments
Razorpay
- Webhook URL - Auto-generated webhook endpoint for Razorpay events
- Key ID - Your Razorpay key ID
- Key Secret - Your Razorpay key secret
- Webhook Secret - For verifying Razorpay webhook signatures
- Toggle to enable/disable Razorpay payments
PayPal
Accept PayPal balance and international cards worldwide.
- Client ID - From your app in the PayPal developer dashboard
- Client Secret - From the same PayPal app
- Webhook ID (optional) - Needed for payment notifications; see below
- Environment - Dropdown with Live (real payments) preselected, or Sandbox for PayPal test mode. Only choose Sandbox together with sandbox credentials from the PayPal developer dashboard.
- Toggle to enable/disable PayPal payments
To connect PayPal:
- Create an app at the PayPal developer dashboard and copy its Client ID and Client Secret into the card.
- In your PayPal app, add a webhook using the Webhook URL shown on the card. Unlike Stripe and Razorpay, this URL is on your own store's domain.
- Subscribe the webhook to the payment capture completed and payment capture denied events.
- Paste the Webhook ID PayPal generates back into the card and save.
PayPal does not support INR. Use it for stores priced in USD, EUR, GBP, and other PayPal-supported currencies.
Refunds you issue from the dashboard for PayPal orders are sent back to the customer through PayPal automatically — the same way Stripe and Razorpay refunds work.
Cart & Checkout
Control how the storefront cart and checkout look and behave at Shop Settings > Cart & Checkout. These settings apply to every theme, and changes go live on your storefront as soon as you save.
Cart Style
Choose how the cart appears, with a visual preview of each option:
- Slide-out Drawer (default) - The cart slides in over the current page when a customer clicks the cart icon or adds an item, so they never leave the page they're on
- Cart Page - Clicking the cart takes customers to the classic full cart page
When the drawer is selected, two extra options appear:
- Drawer opens from - Right (recommended) or Left
- Auto-open on add - Automatically open the drawer when a customer adds an item to the cart (on by default)
Cart Extras
- Free shipping progress bar - Show a bar in the cart that tells customers how much more they need to spend to unlock free shipping. Turning it on reveals a threshold field in your store's currency.
- Order note field - Let customers add a note to their order from the cart; the note is saved with the order
- Checkout button label - Customize the text on the cart's checkout button (up to 40 characters, defaults to "Checkout")
Checkout Style
- Full Page (default) - Checkout opens as a normal page
- Popup Card - Checkout opens in a centered card over a dimmed background
Terms Agreement
- Require terms agreement - Add a required checkbox customers must tick before completing their purchase
- Agreement text - Customize the checkbox wording (defaults to "I agree to the Terms of Service and Refund Policy")
Tax Settings
Configure tax rules at Shop Settings > Tax.
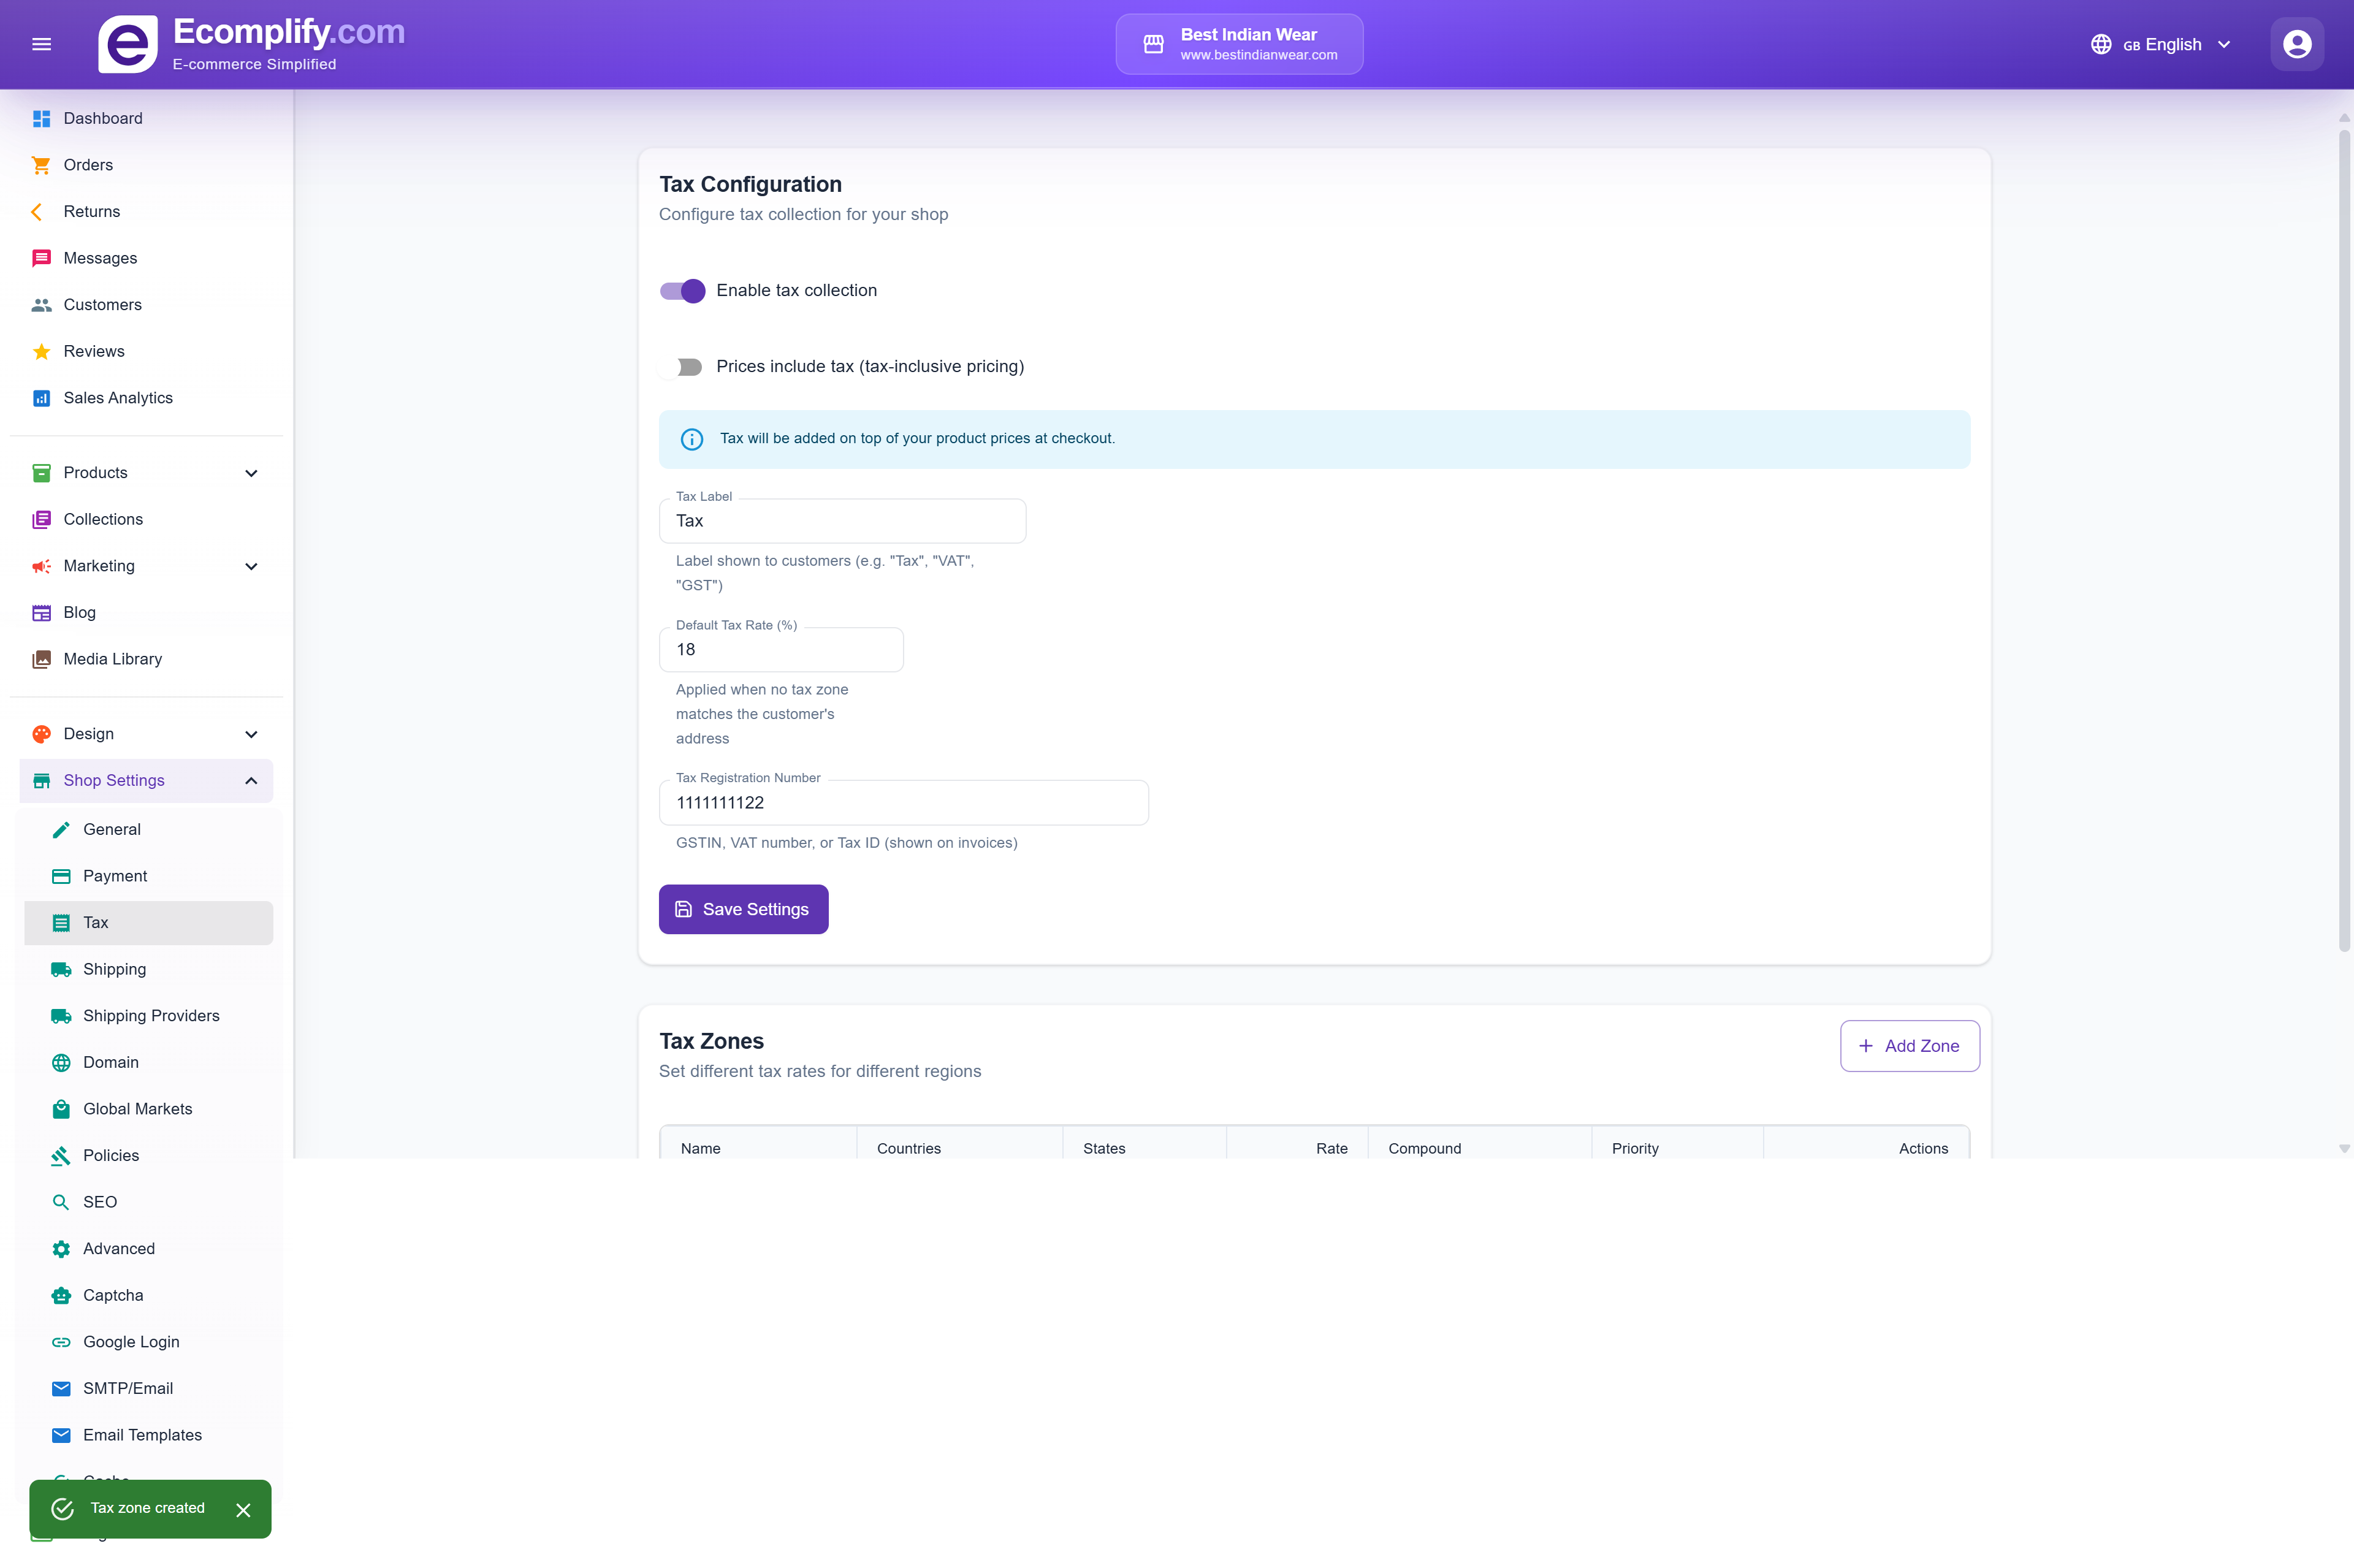
Tax Configuration
- Enable tax collection - Toggle tax on/off
- Prices include tax - Whether your prices already include tax
- Tax Label - Label shown to customers (e.g., "Tax", "GST", "VAT")
- Default Tax Rate - Percentage applied when no zone matches
- Tax Registration Number - Your business tax ID
- GSTIN/VAT number - Additional tax identification
Tax Zones
Create region-specific tax rates:
- Zone Name - Name for the tax zone (e.g., "Maldives", "EU")
- Countries - Select which countries this zone applies to
- States/Regions - Optional state-level filtering
- Tax Rate - Percentage for this zone
- Priority - Higher number = higher priority for overlapping zones
- Compound Tax - Whether to apply tax on top of other taxes
- Applies To - All Products or specific products
Shipping Settings
Configure shipping at Shop Settings > Shipping.
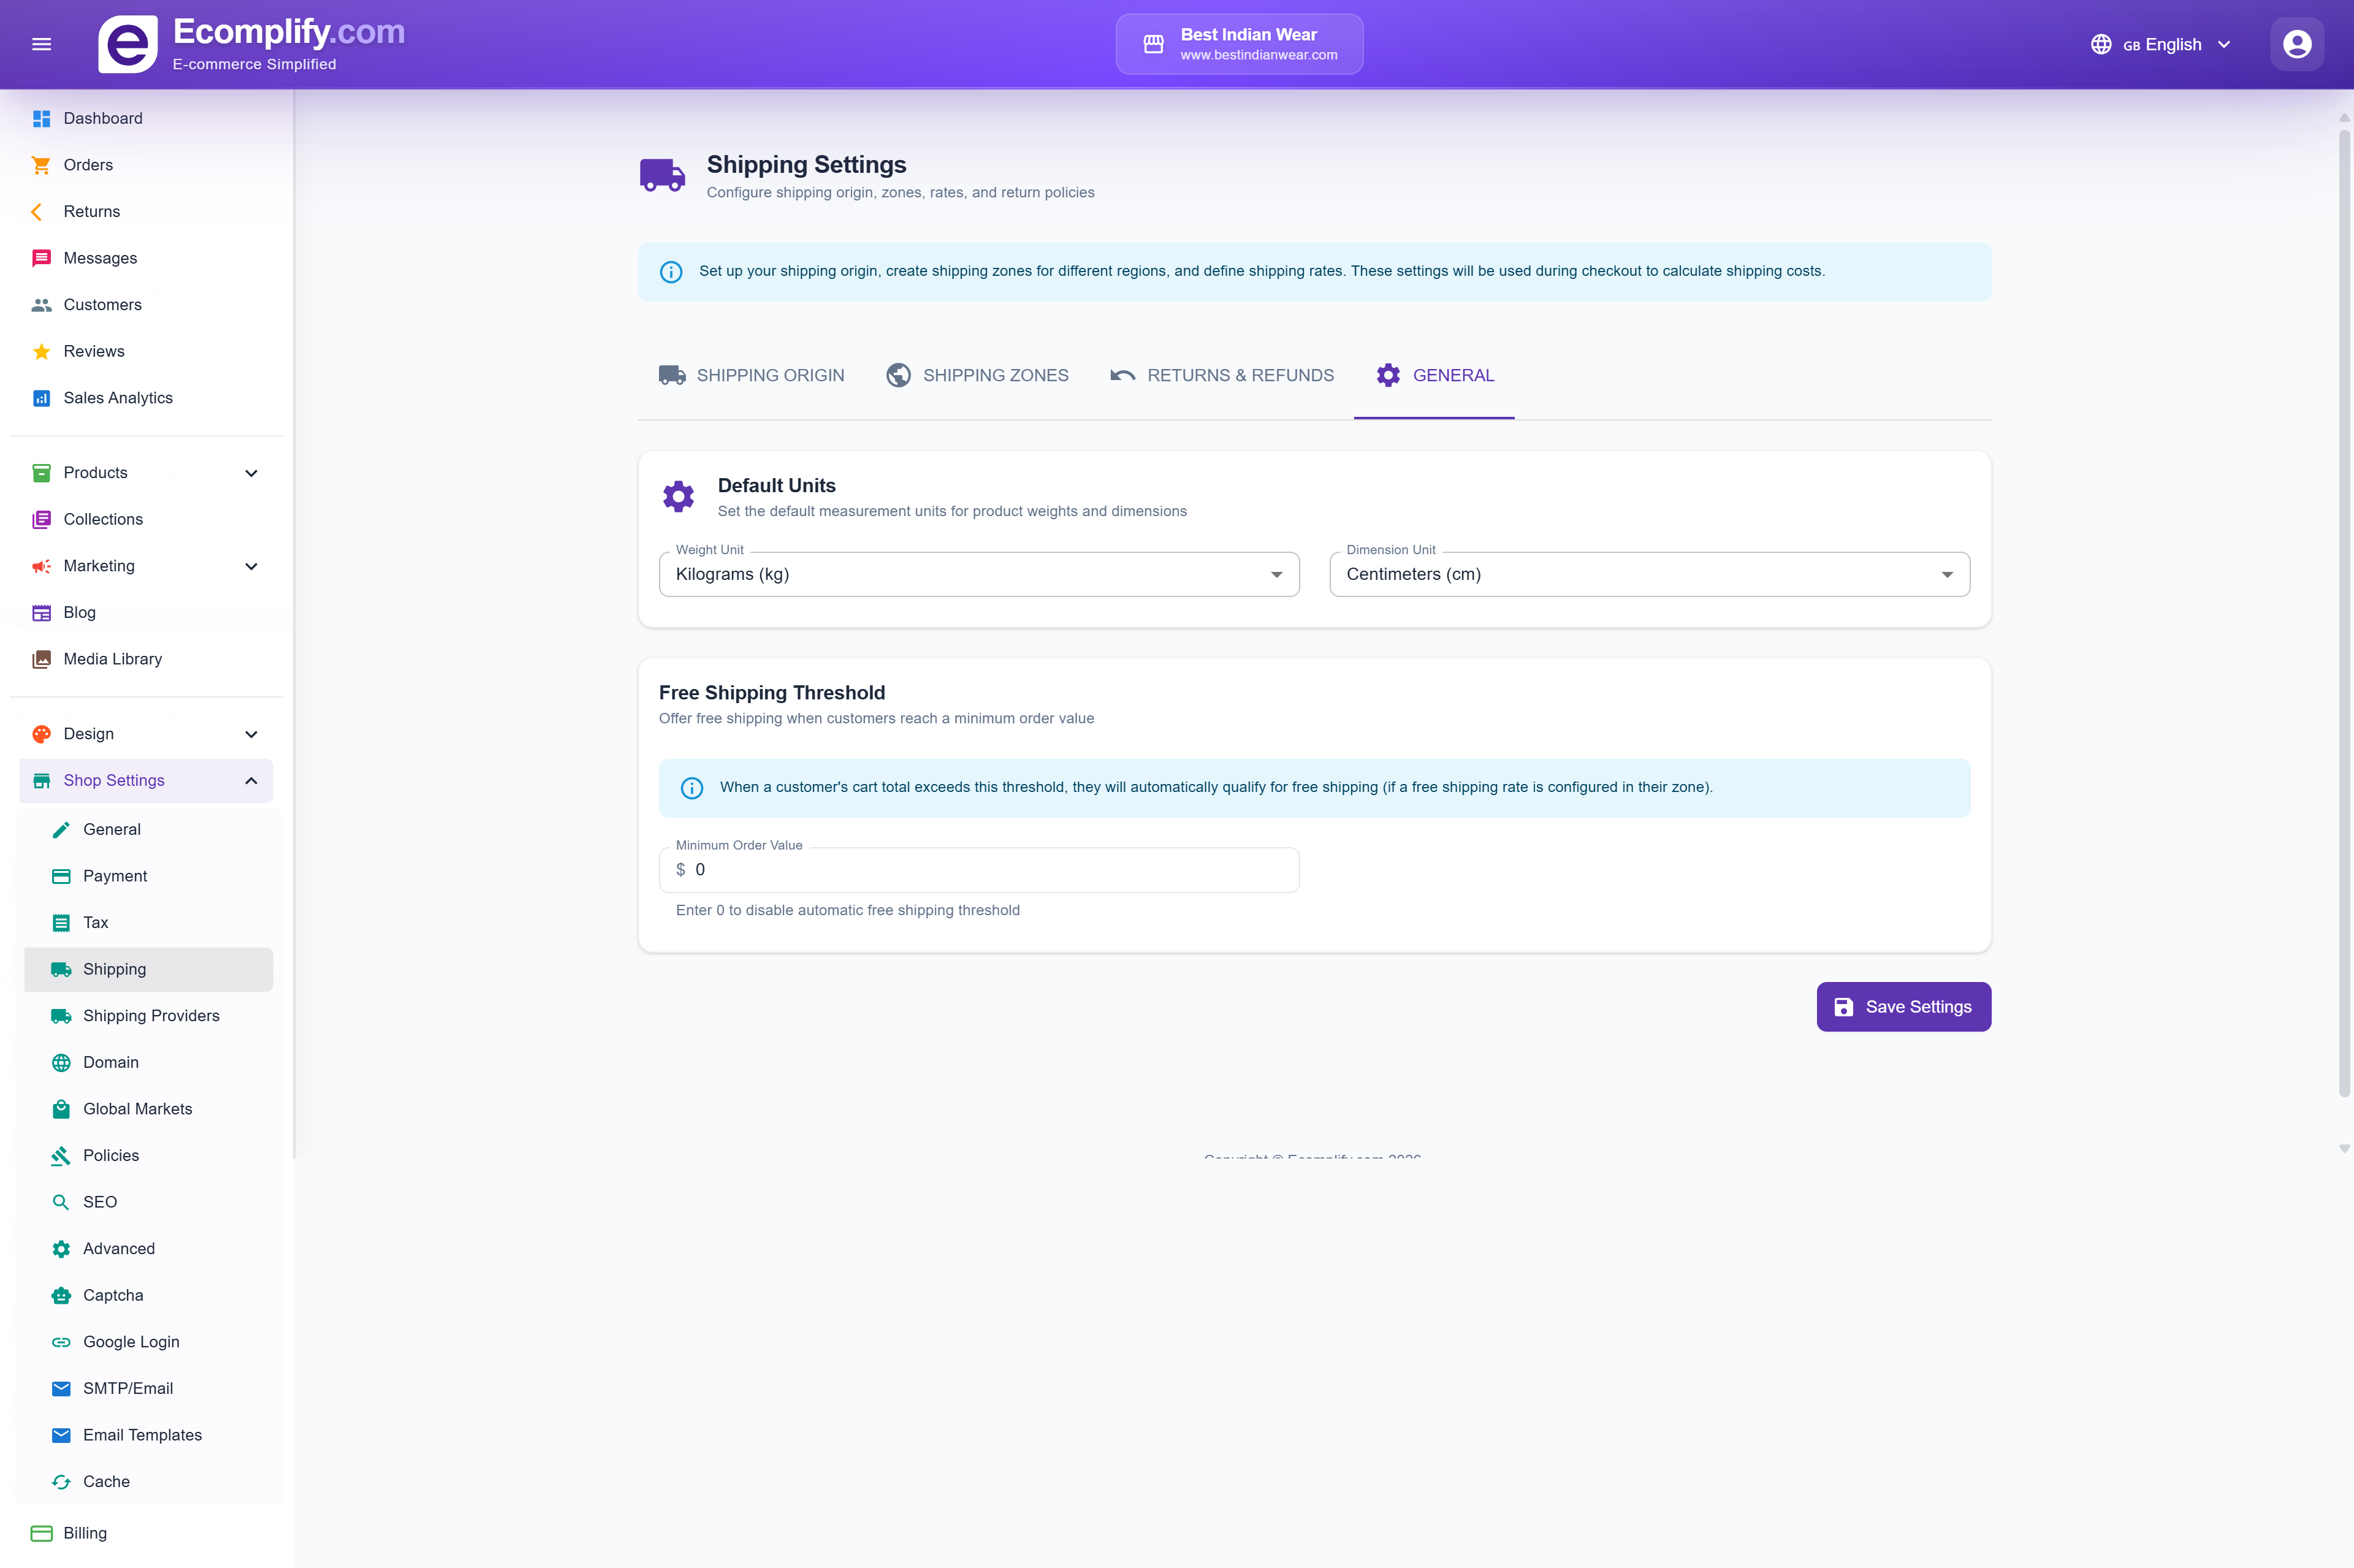
Tabs
Shipping Origin
Set your warehouse/fulfillment center address:
- Warehouse name
- Country and state/province
- City and ZIP/postal code
- Street address
- Phone and email (optional)
Shipping Zones
Create zones with different shipping rates for different regions.
Returns & Refunds
Configure your return and refund policies.
General
General shipping settings and defaults.
Shipping Providers
Integrate with shipping carriers at Shop Settings > Shipping Providers.
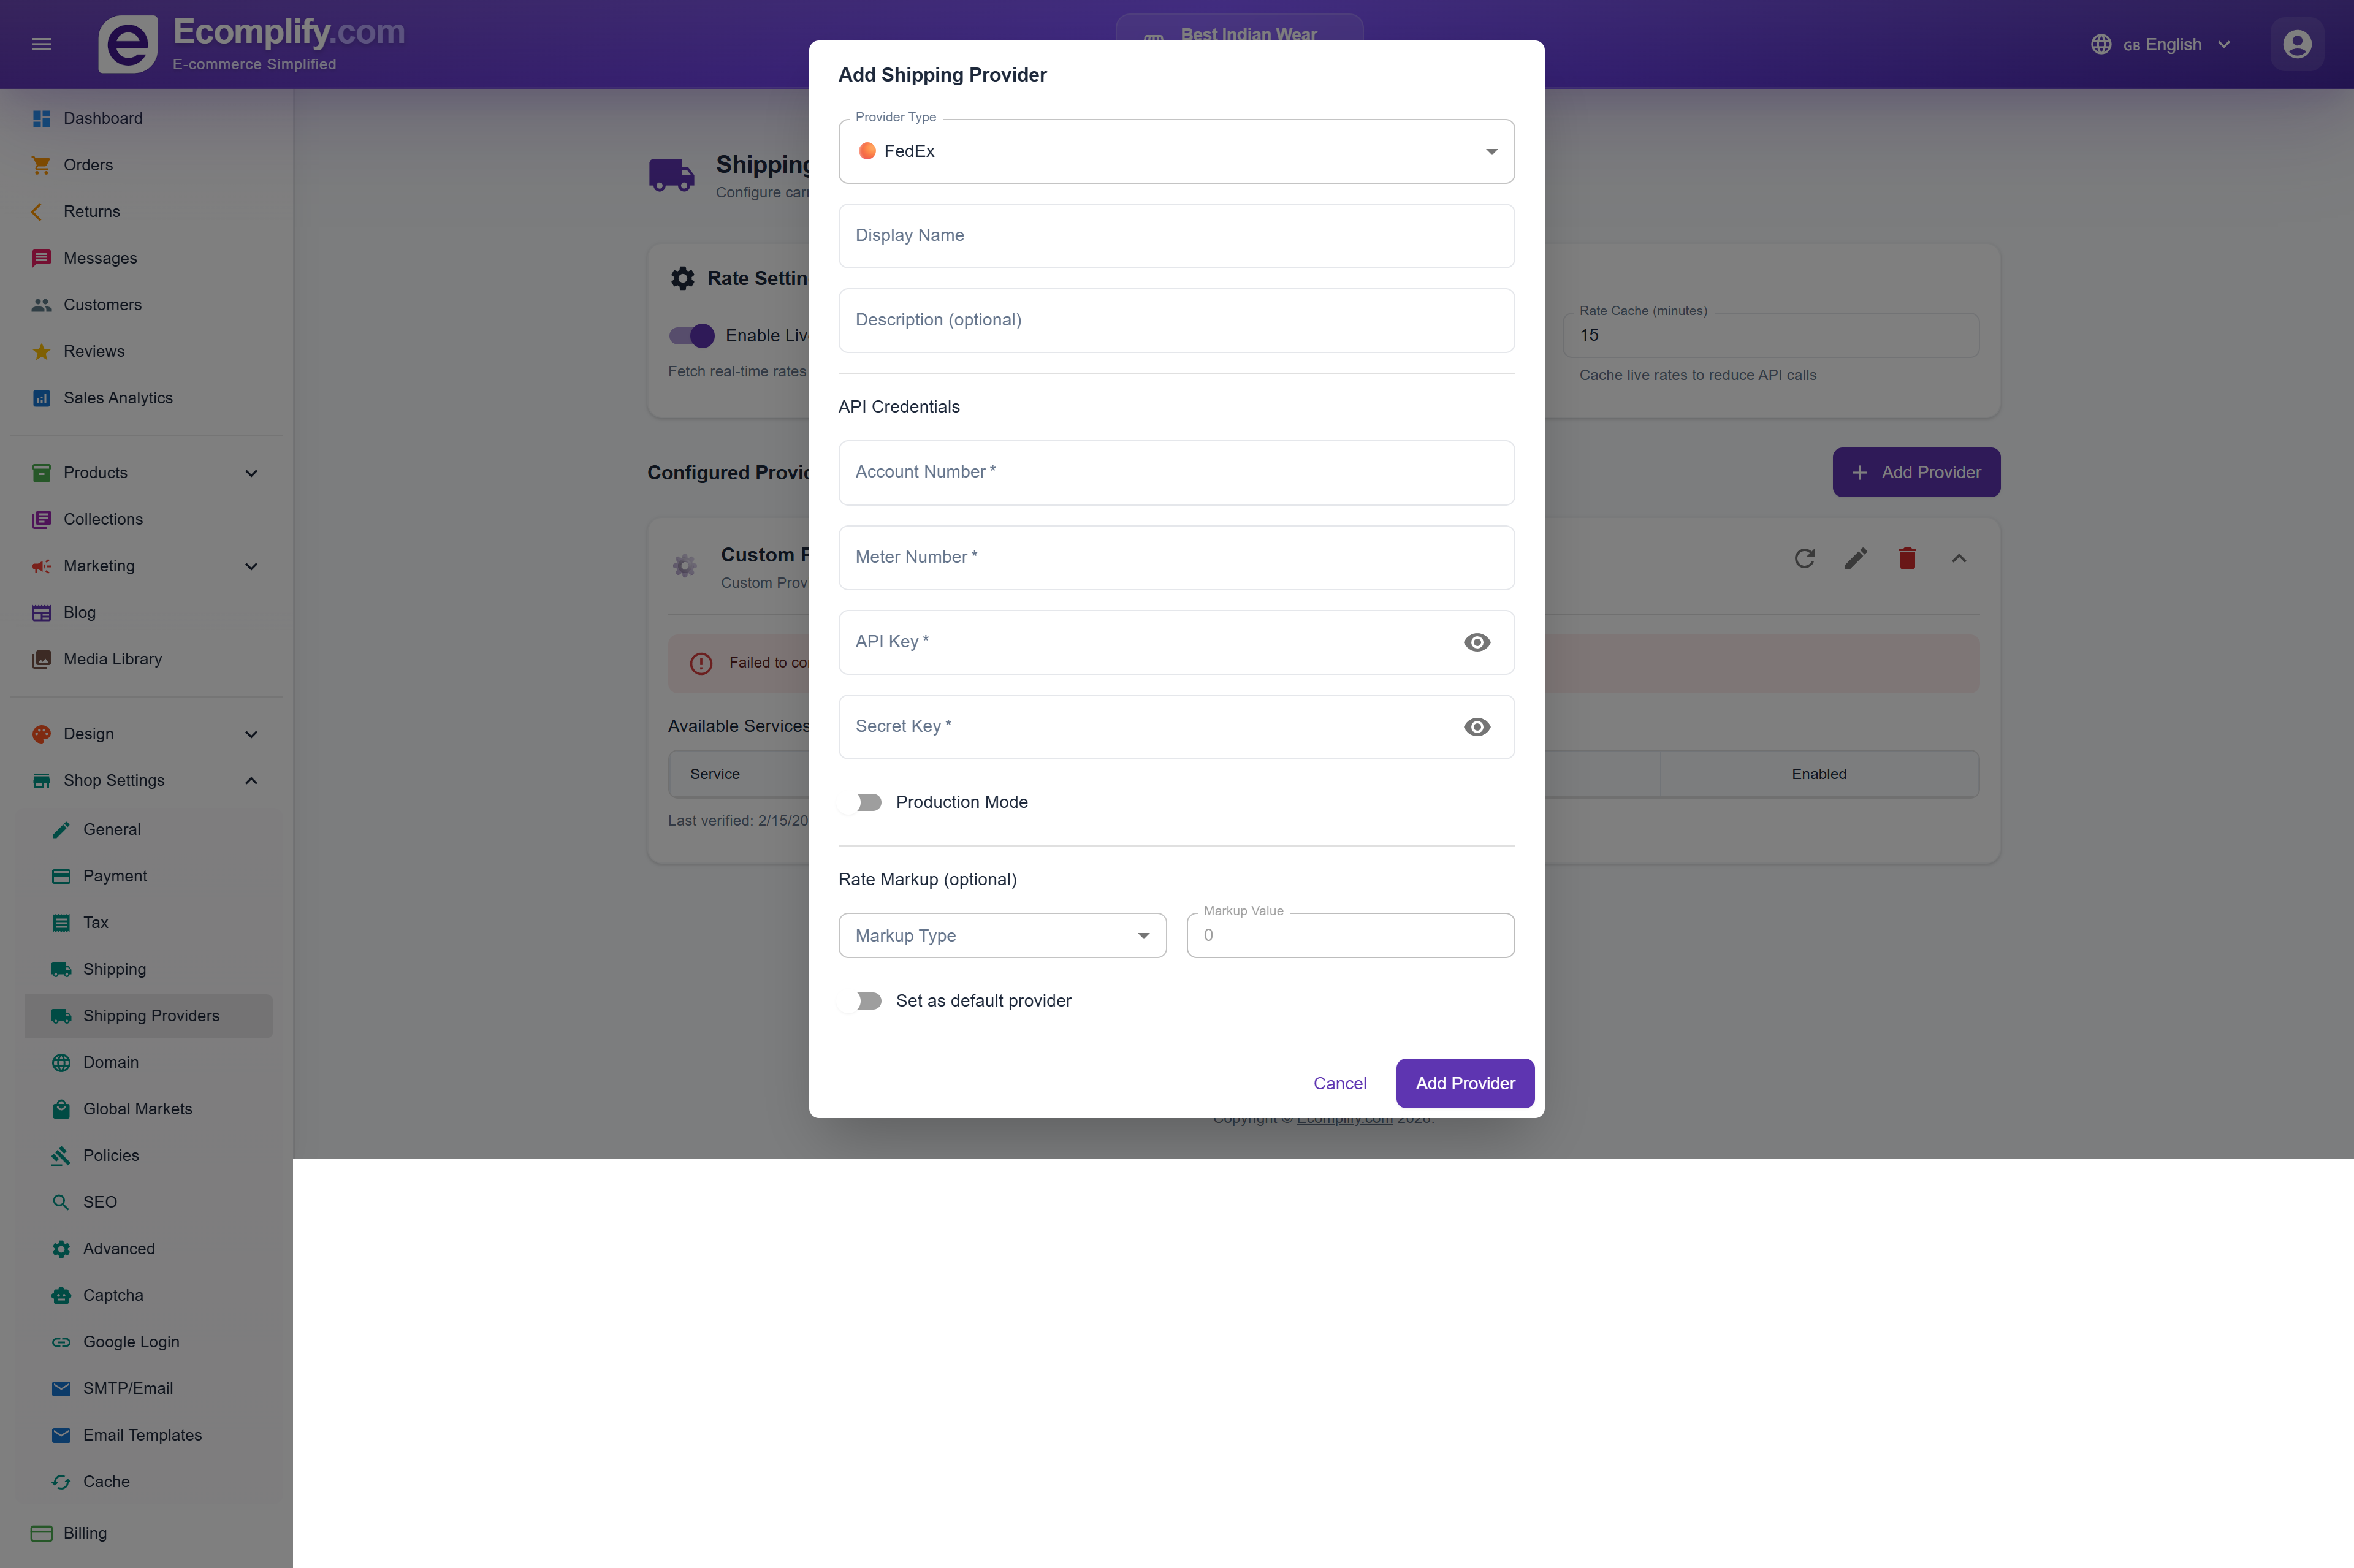
Connect to major carriers for real-time rate calculation:
- FedEx
- UPS
- USPS
- DHL
- Other regional carriers
Domain
Set up your custom domain at Shop Settings > Domain.
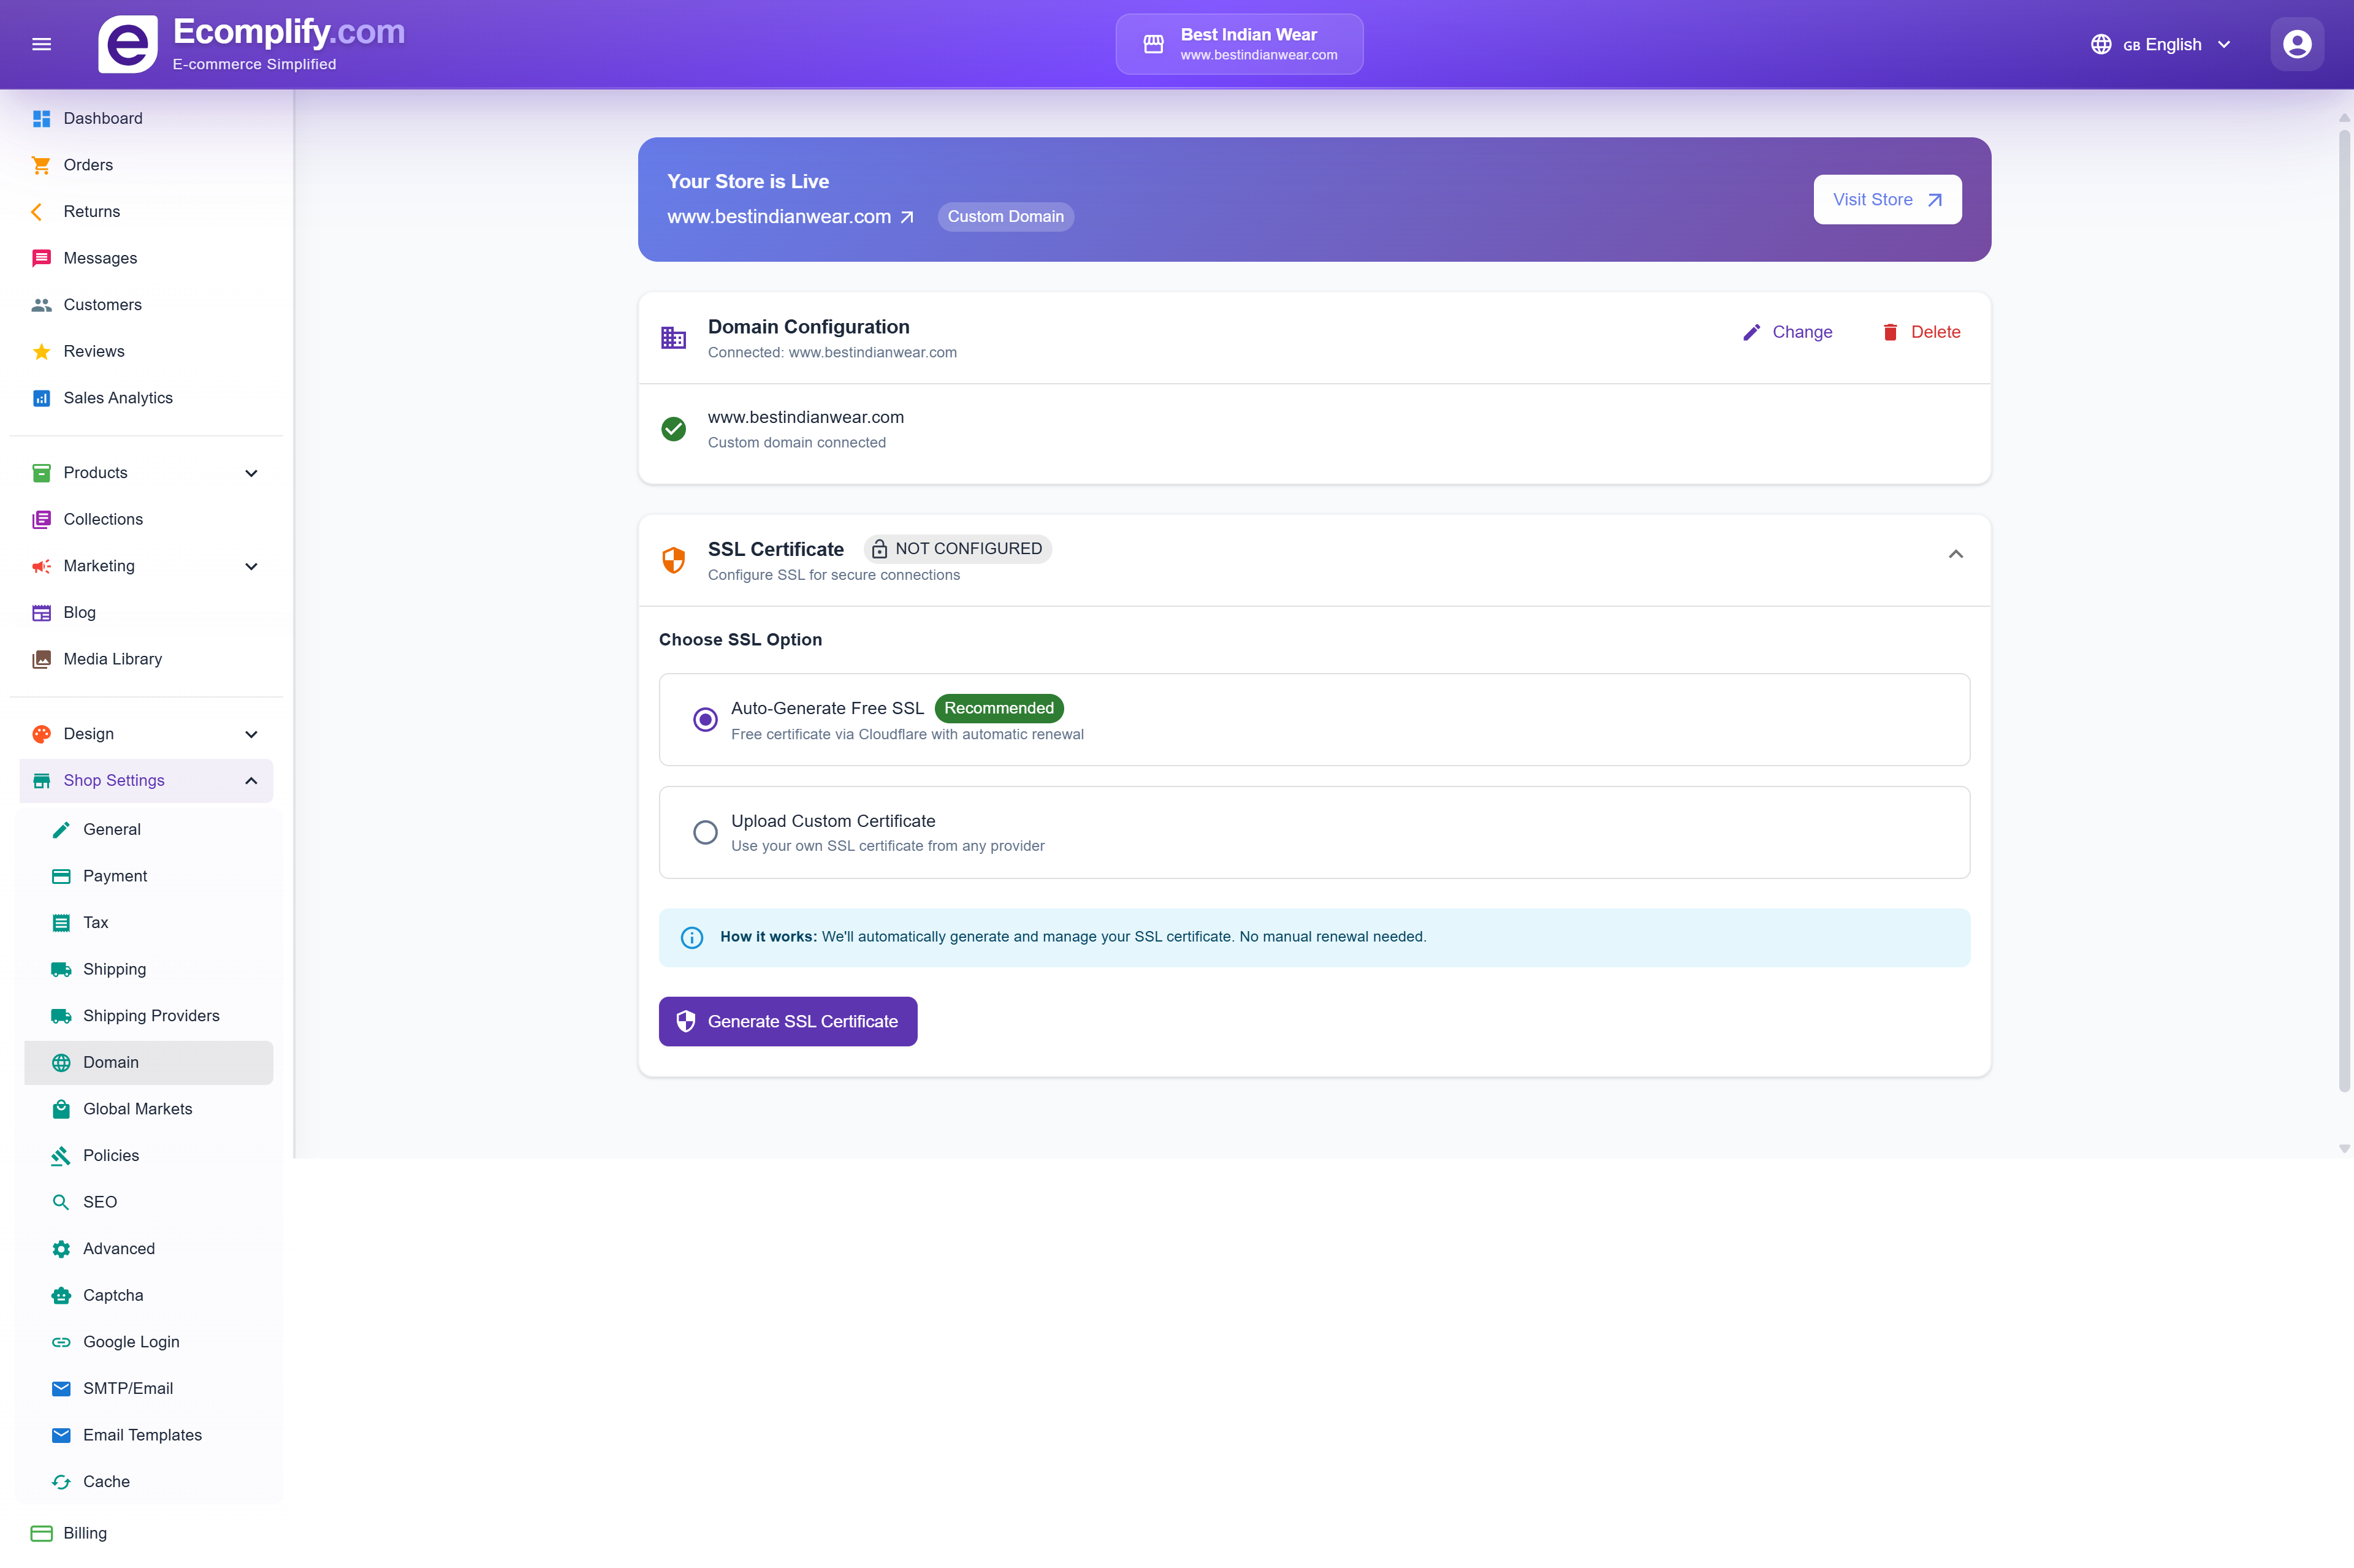
Connect a free yourstore.ecomplify.net subdomain, or your own domain with free HTTPS.
👉 Follow the full step-by-step guide: Connect Your Domain — it covers the CNAME record setup at GoDaddy, Namecheap, Cloudflare and others, plus the most common DNS mistakes.
Policies
Manage legal policies at Shop Settings > Policies.
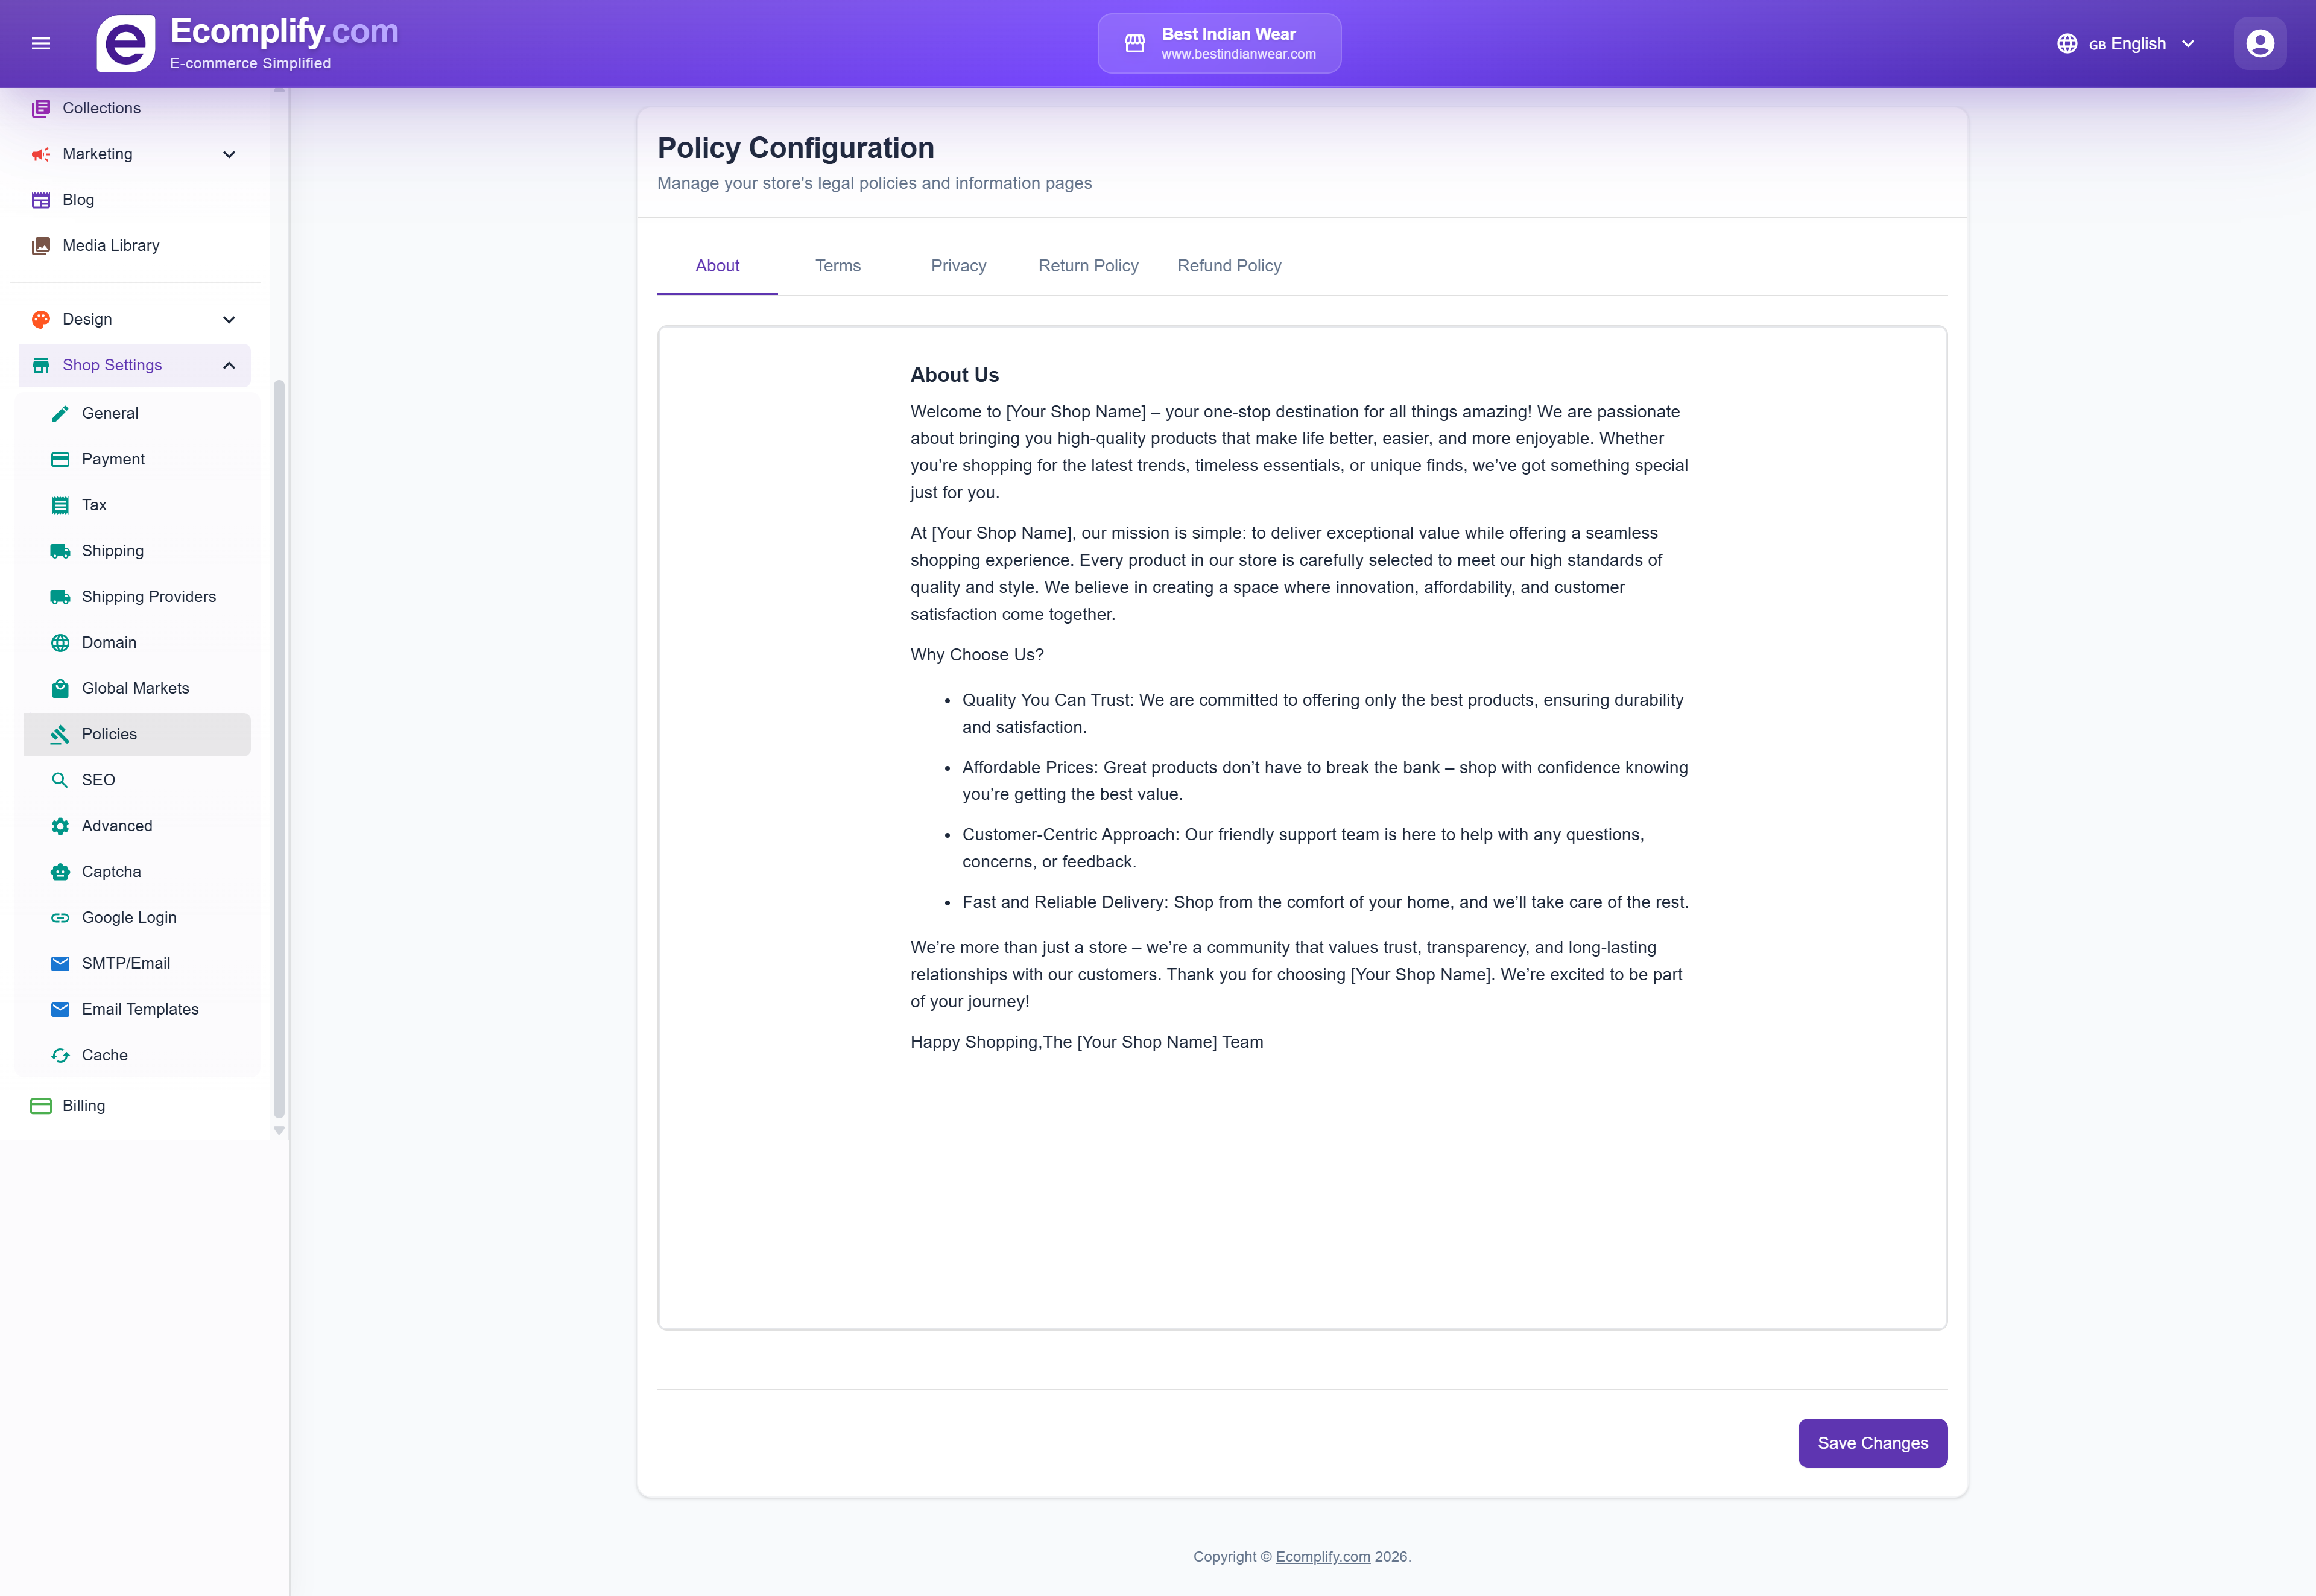
Create and edit:
- Terms of Service
- Privacy Policy
- Return Policy
- Shipping Policy
- Refund Policy
Each policy has a rich text editor for formatting.
SEO
Configure search engine optimization at Shop Settings > SEO.
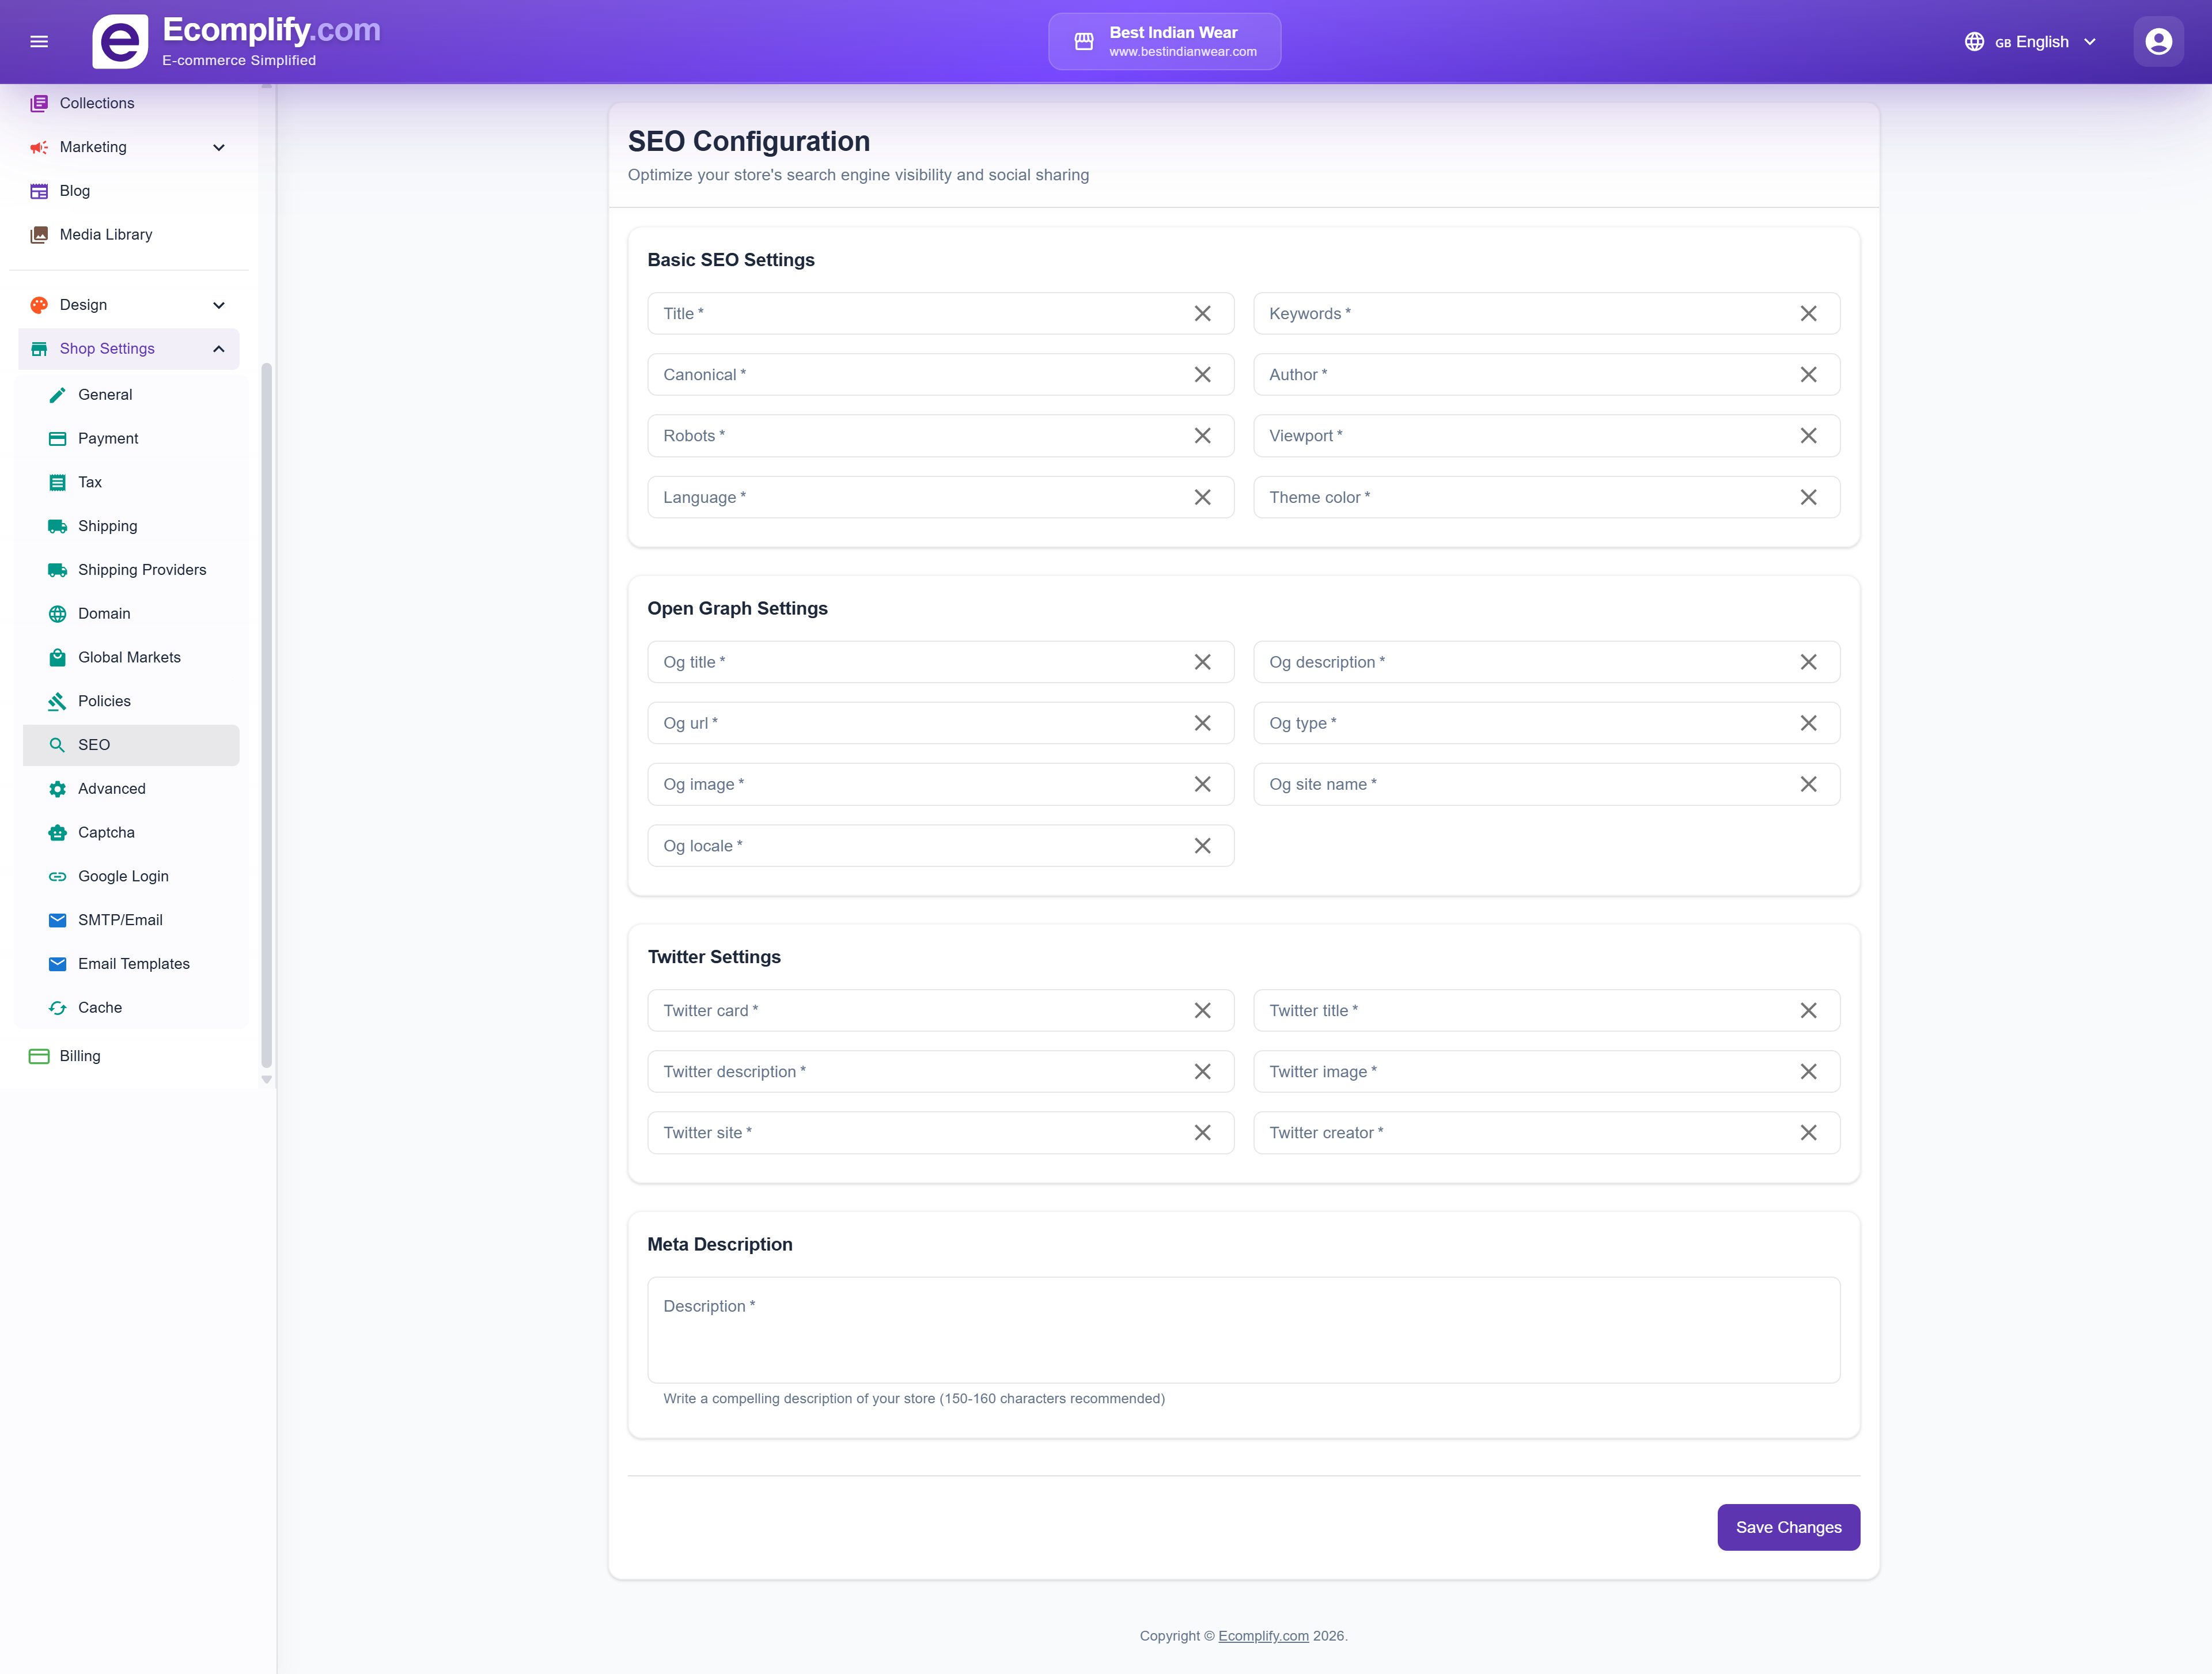
- Meta title and description for your store homepage
- Default SEO settings for pages
- Sitemap configuration
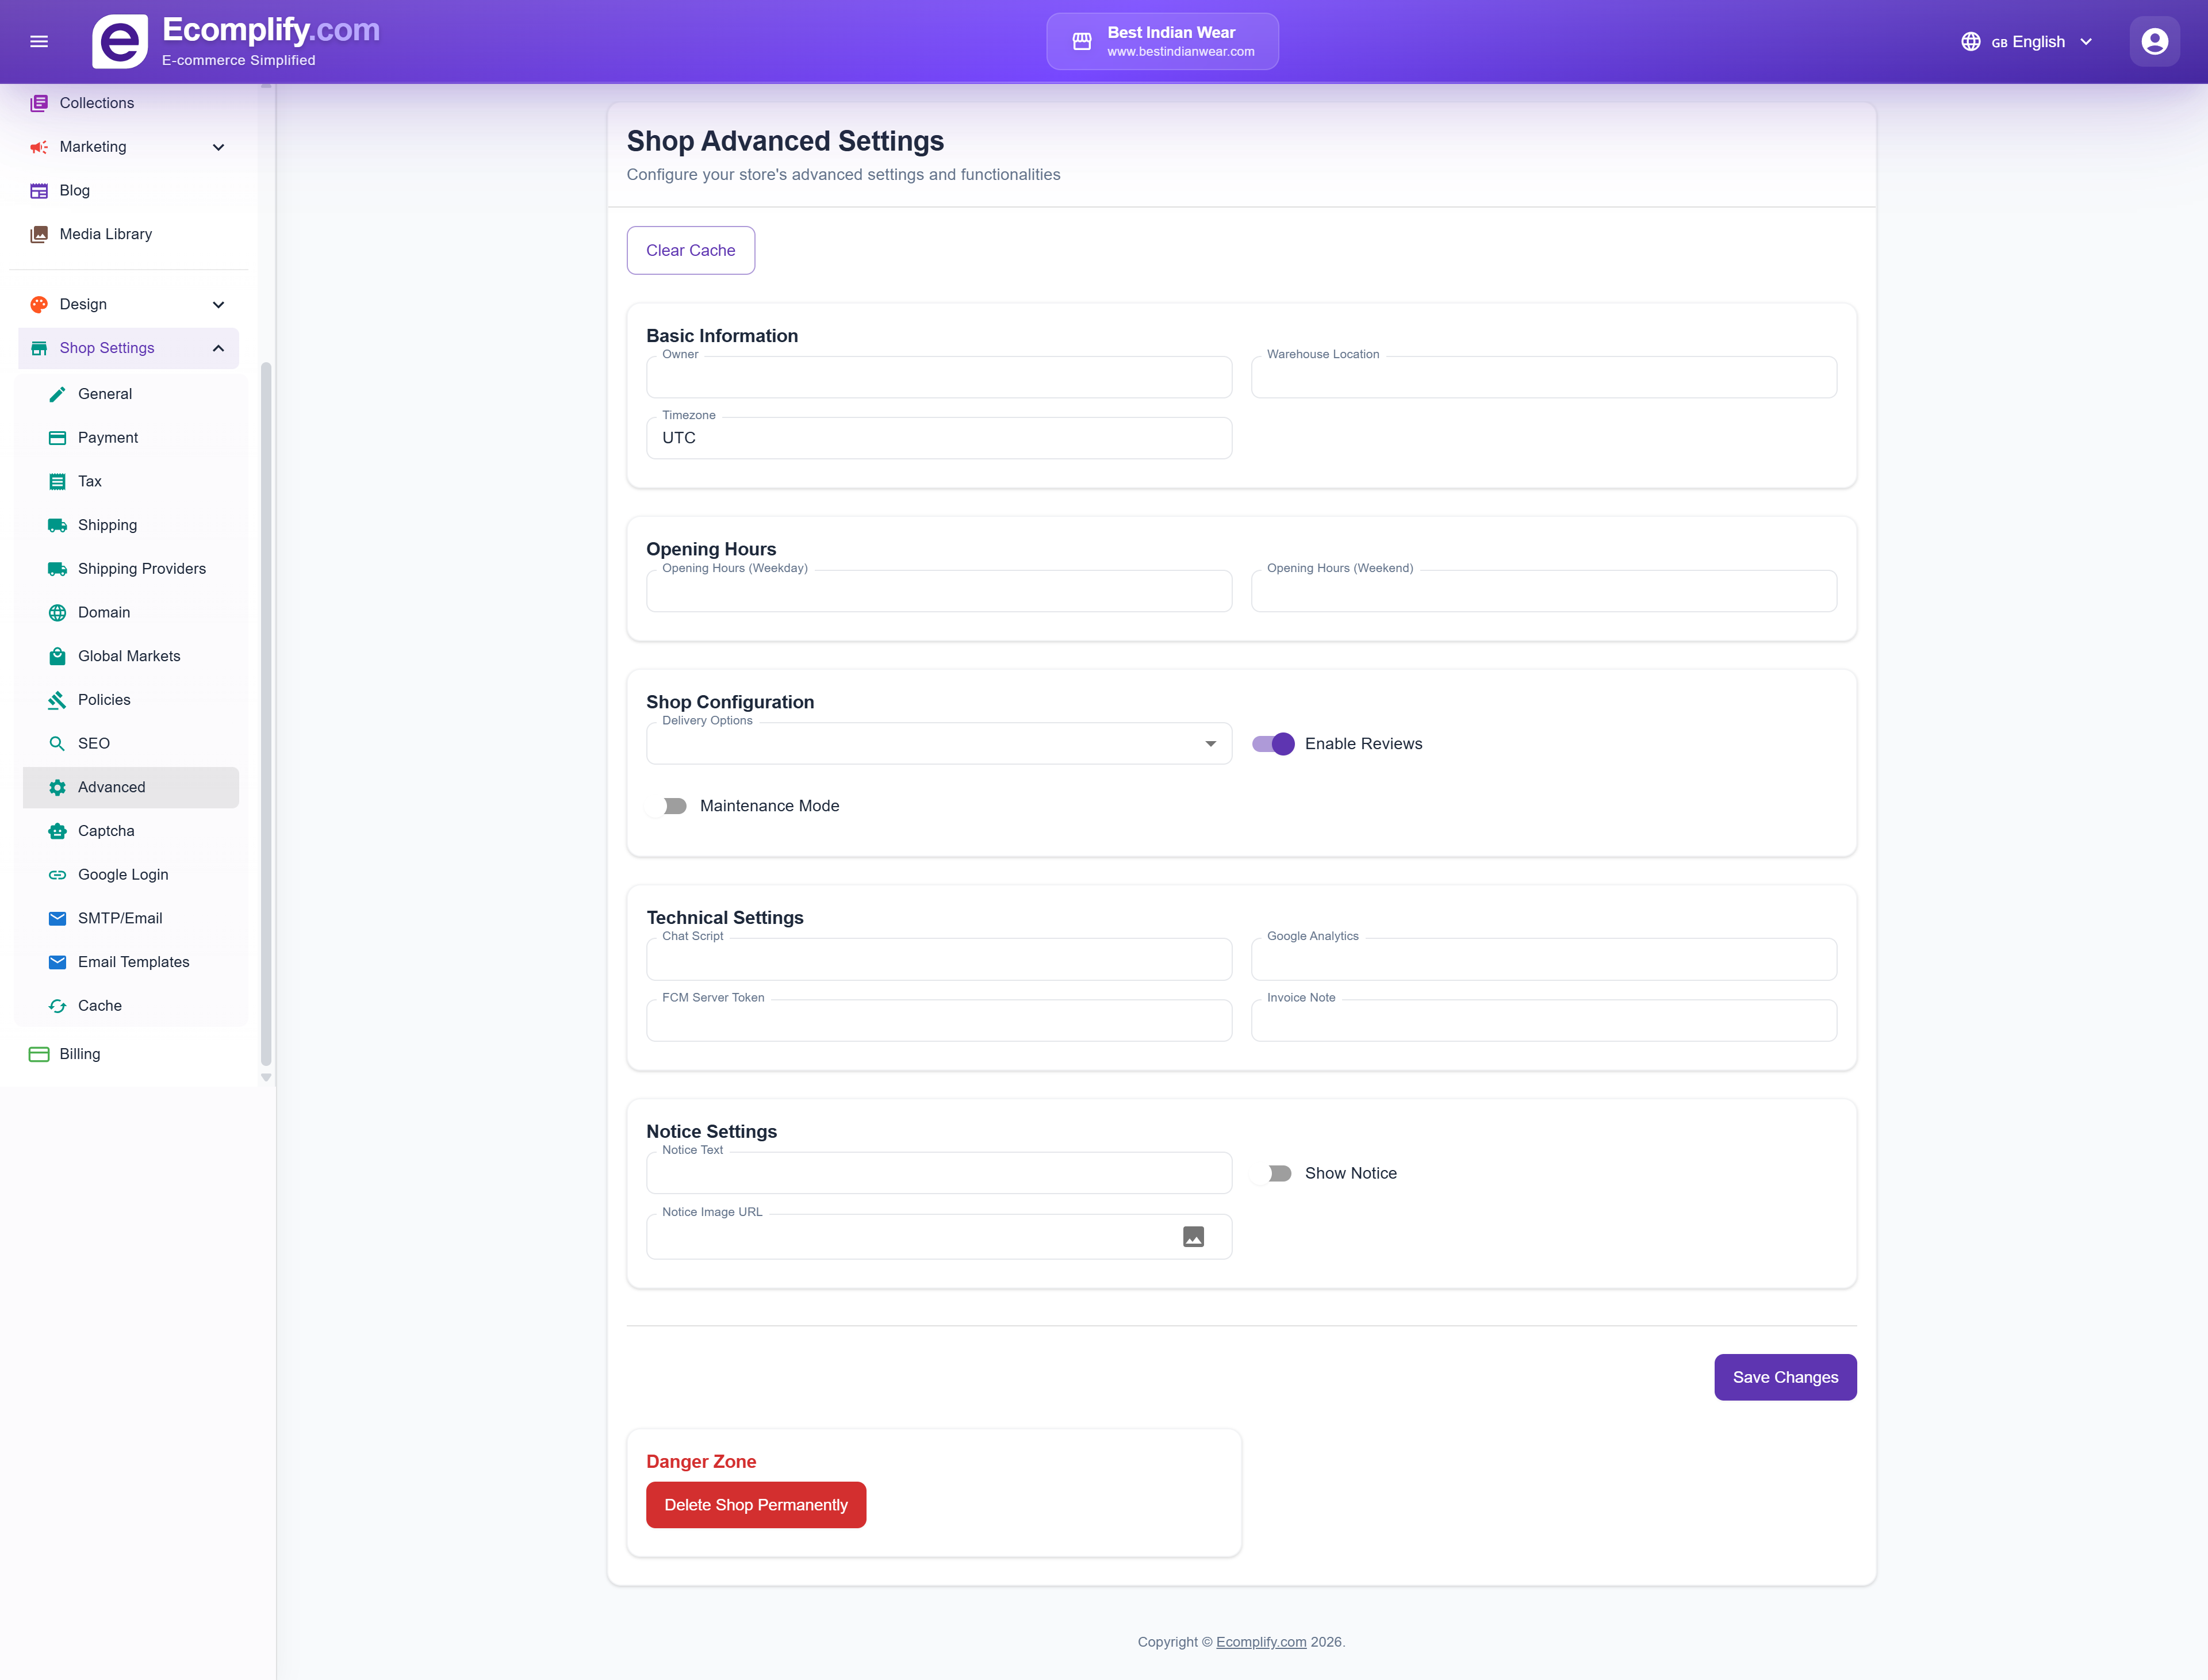
Advanced Settings
Access advanced features at Shop Settings > Advanced.
Captcha
Configure bot protection at Shop Settings > Captcha.
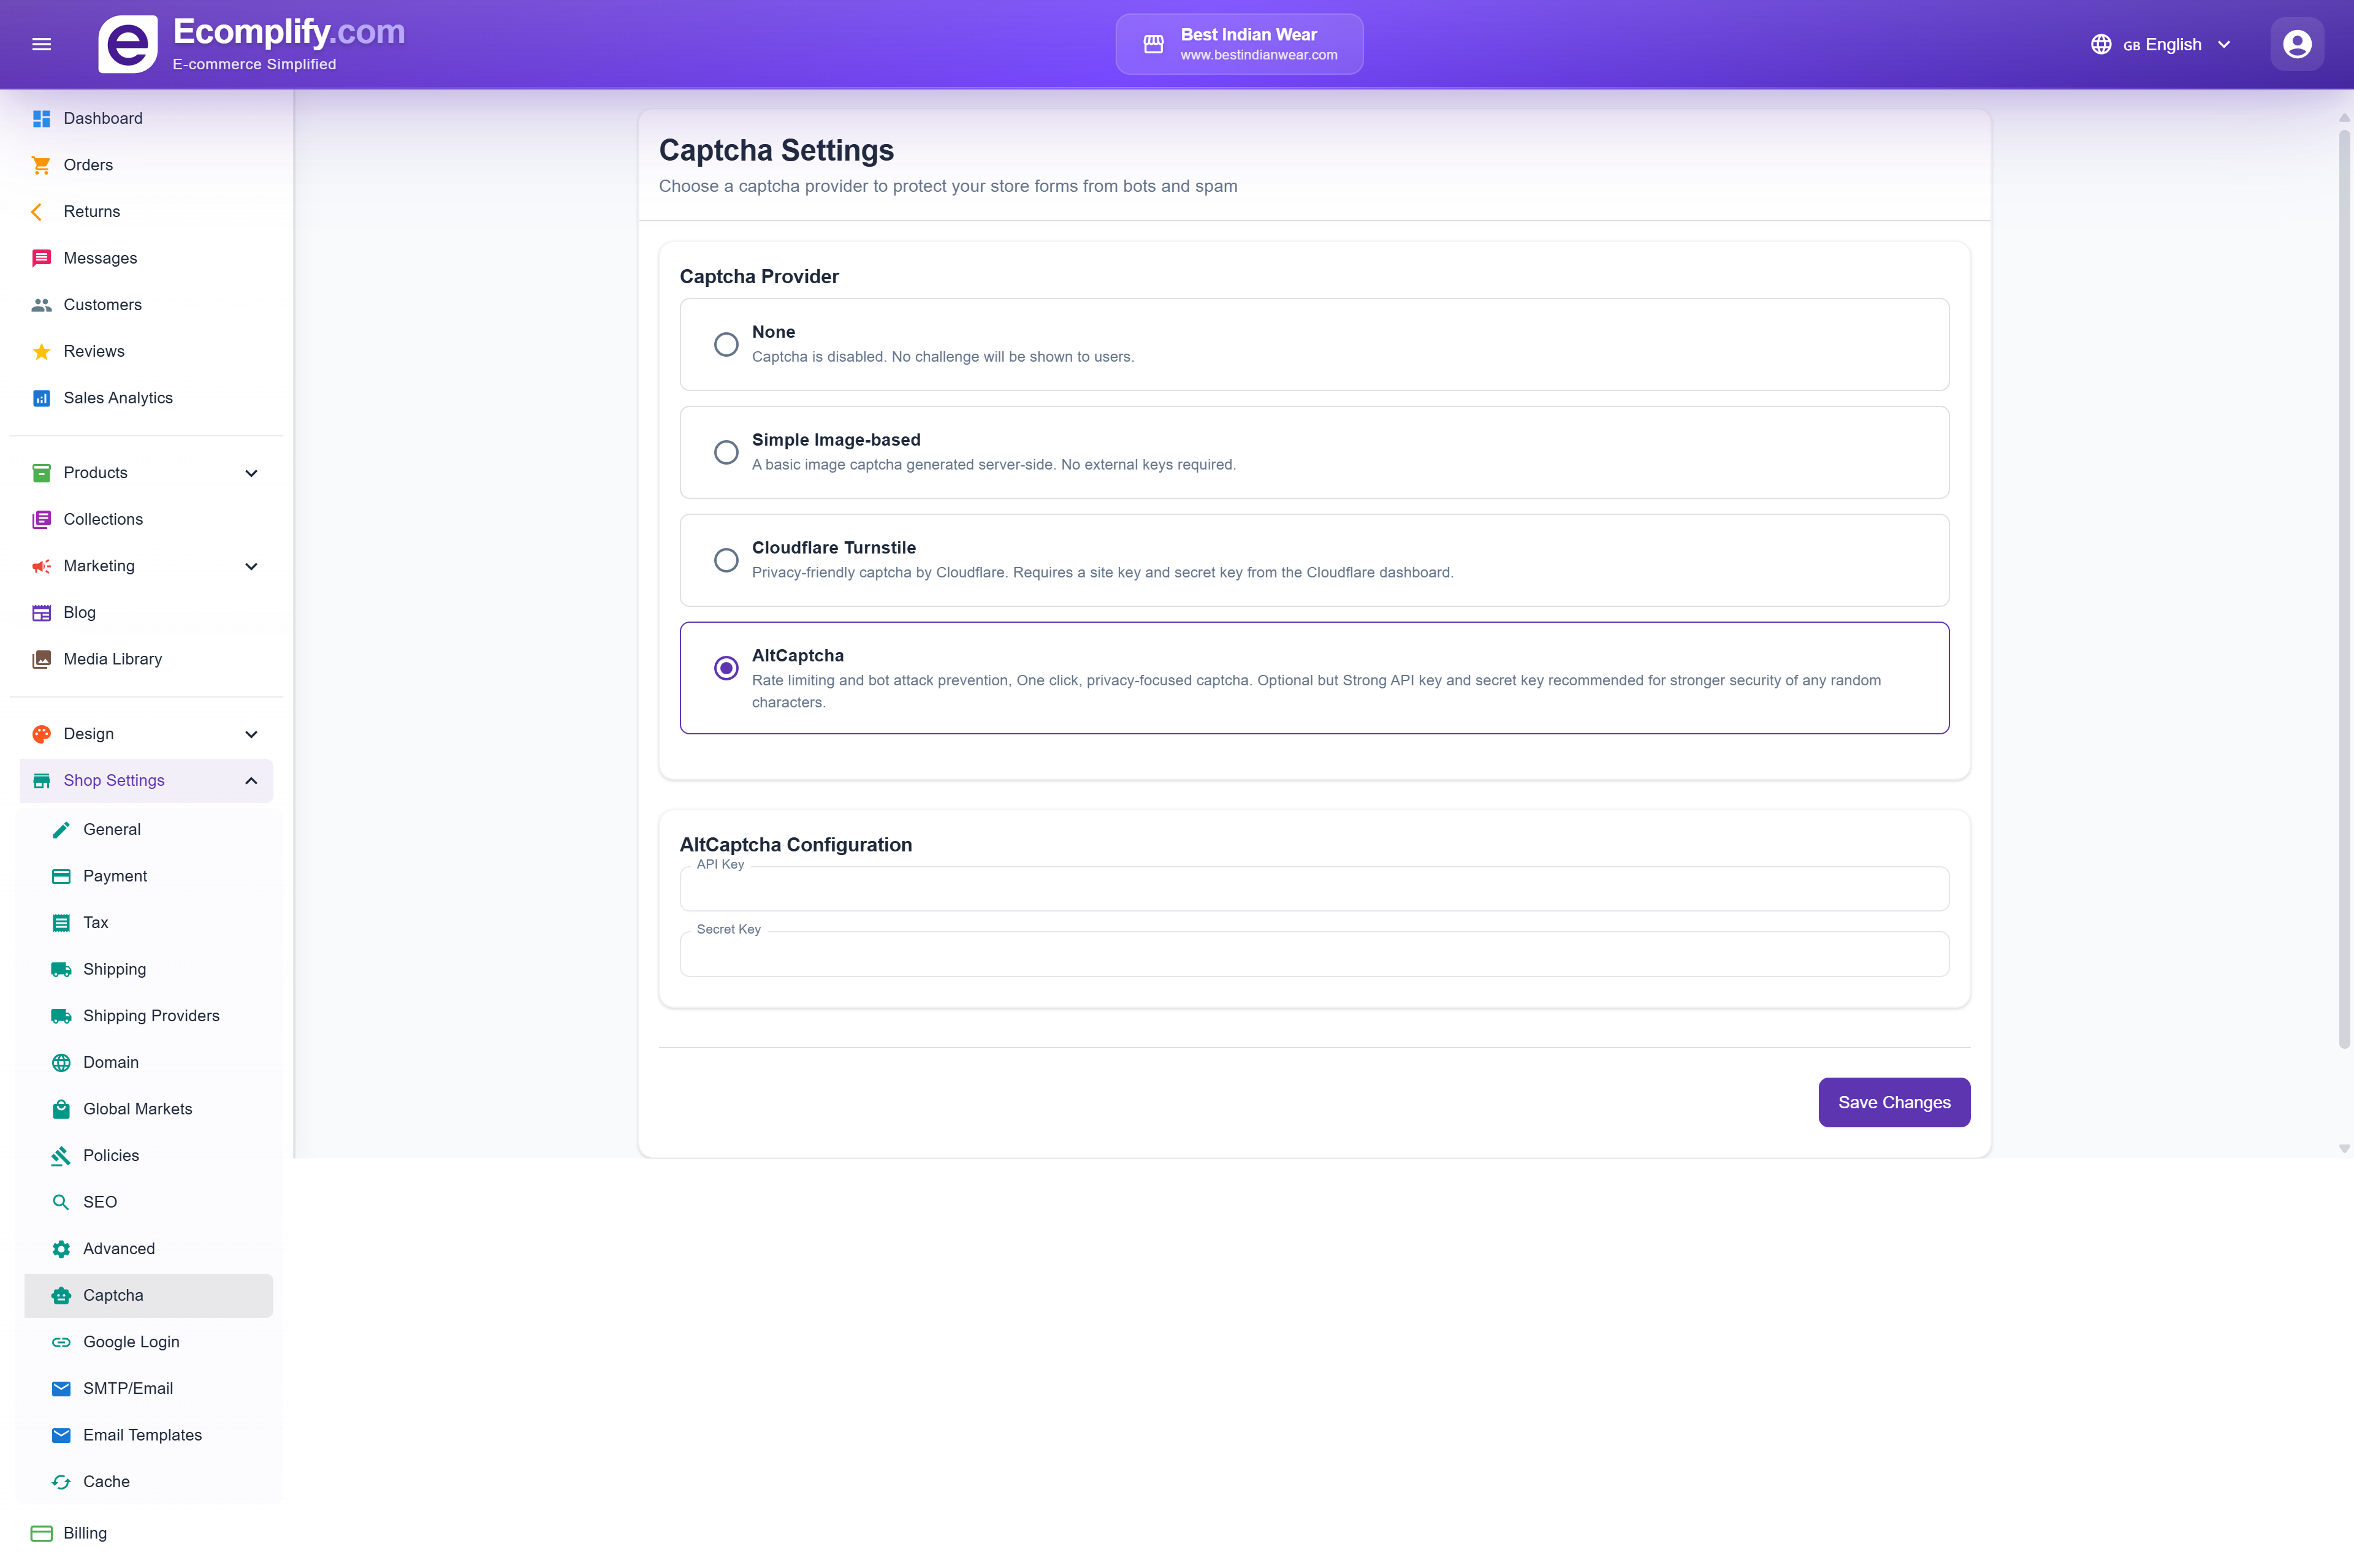
Set up CAPTCHA verification for forms like contact, signup, and checkout.
Google Login
Enable Google OAuth at Shop Settings > Google Login.
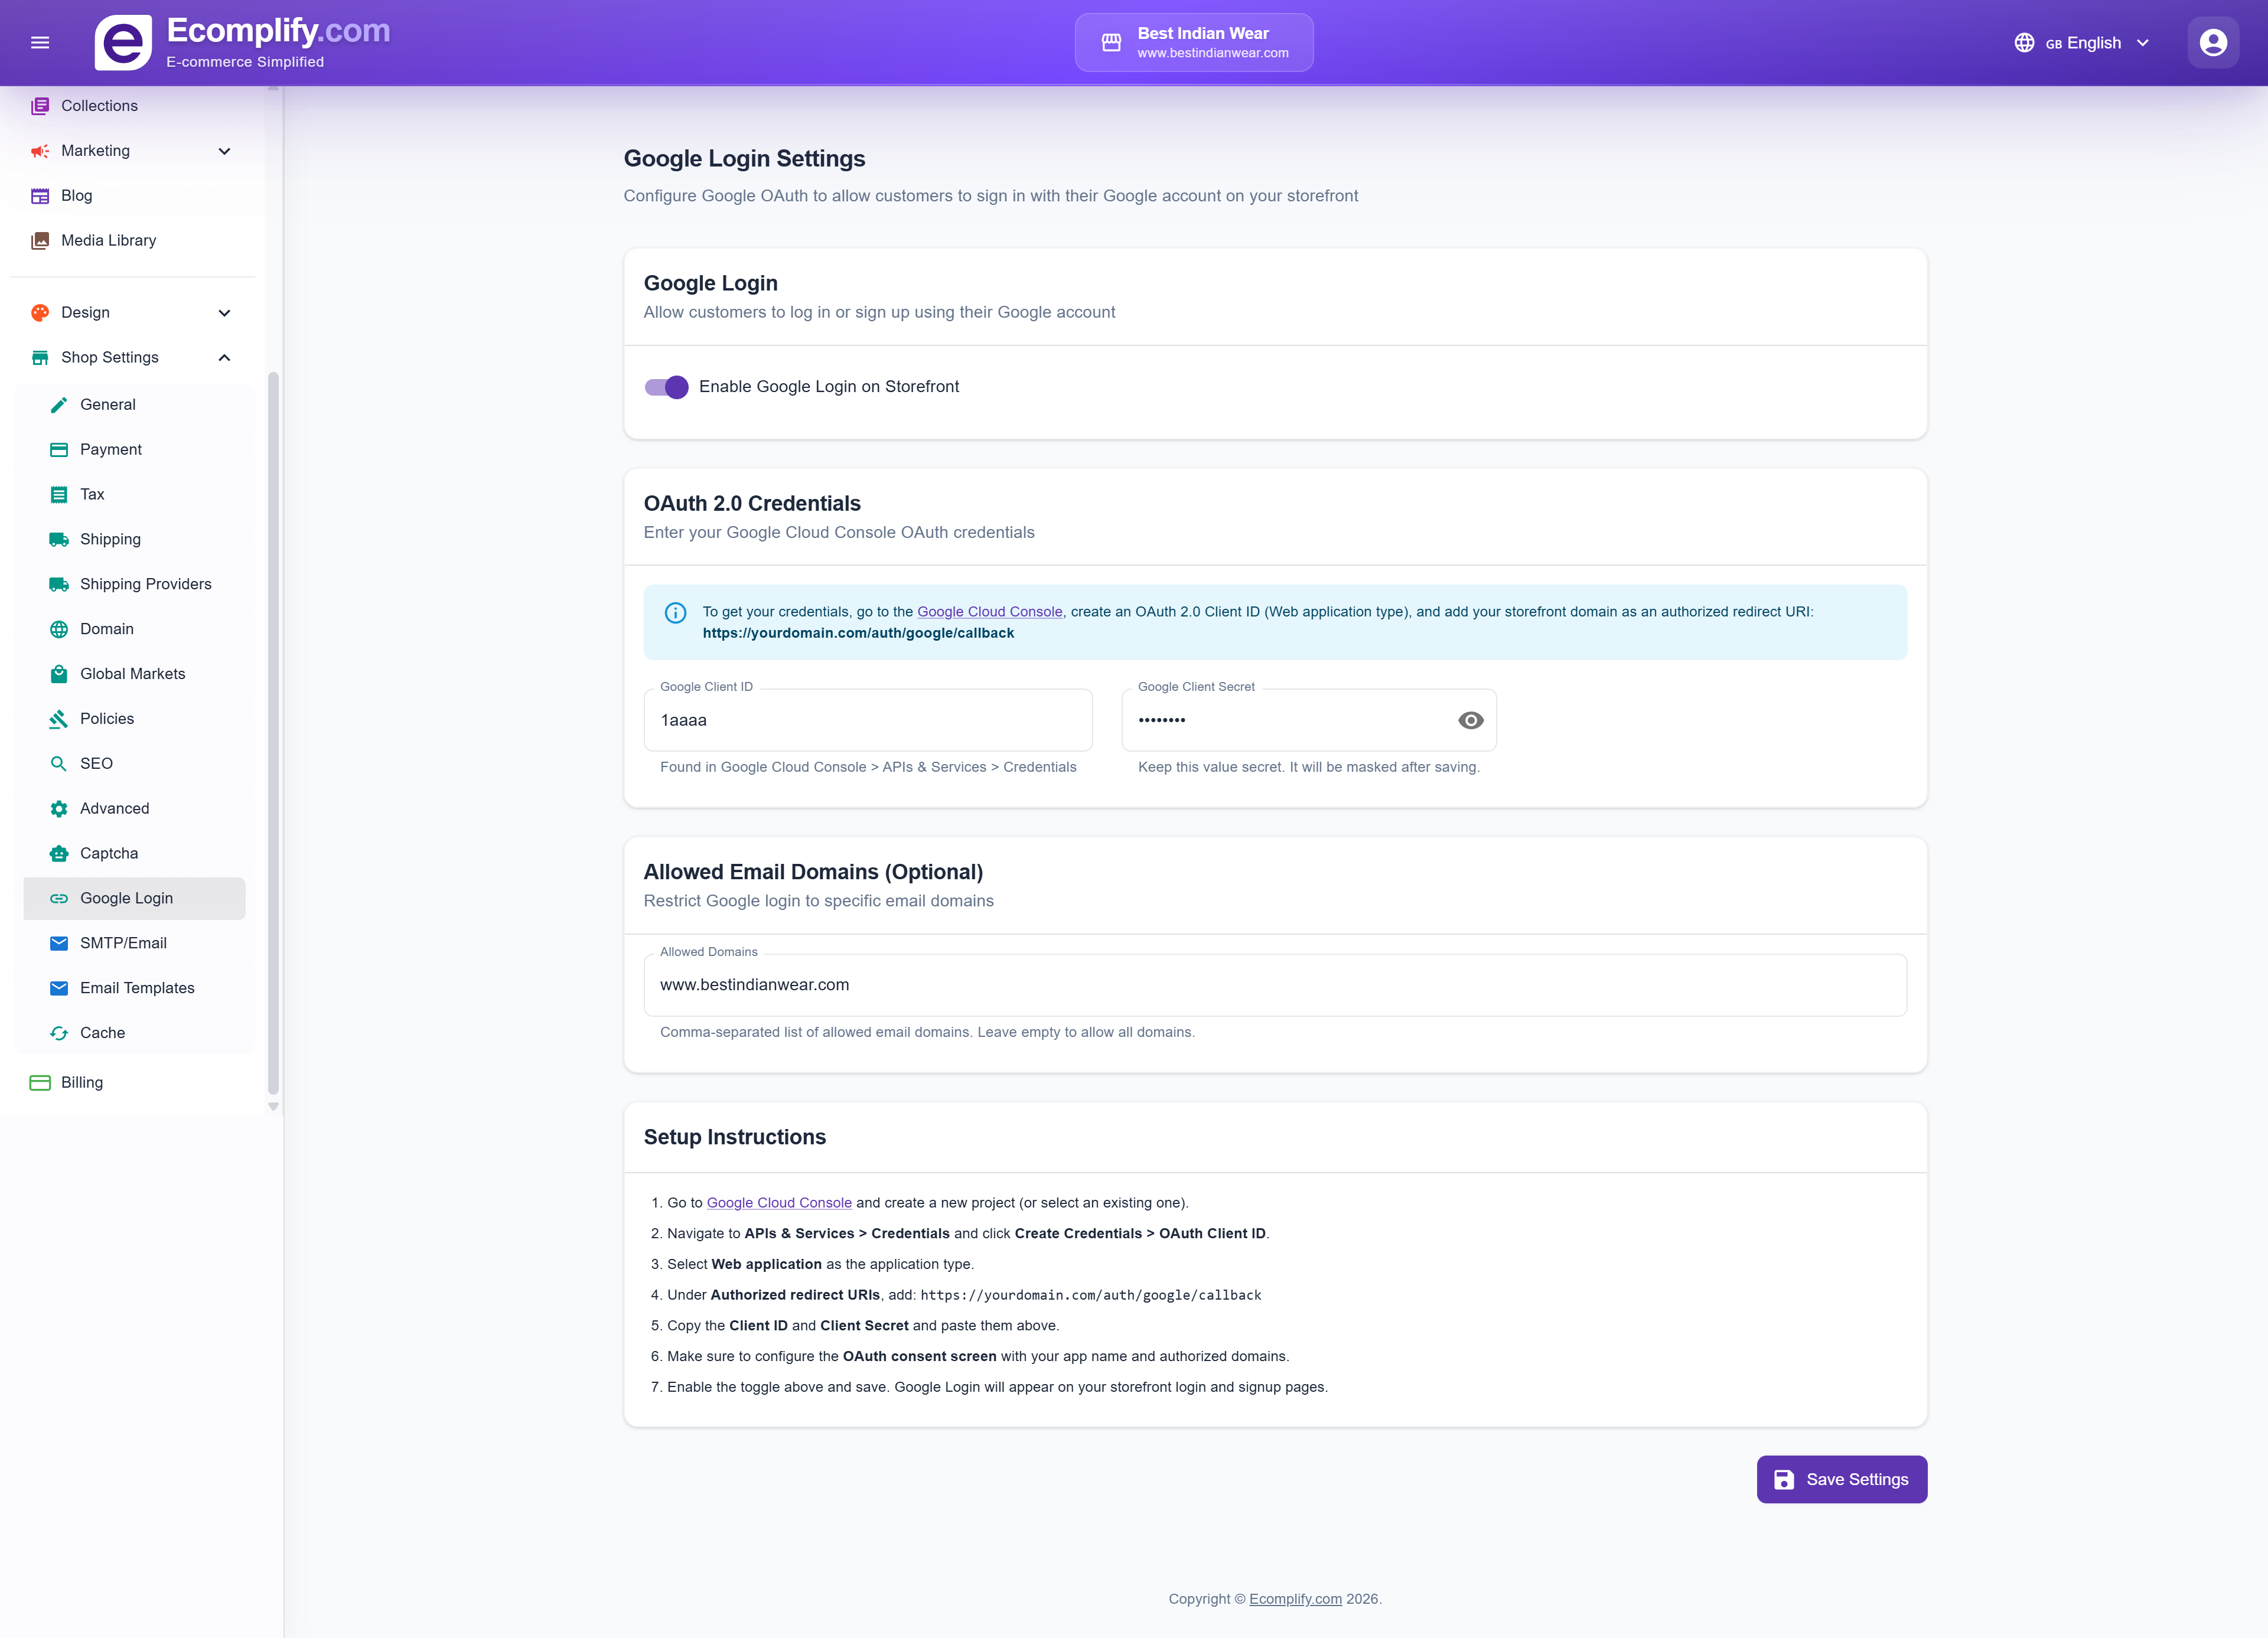
Configure Google OAuth for customer login:
- Google Client ID
- Google Client Secret
- Redirect URI configuration
OTP Login (Phone & WhatsApp)
Let customers sign in to your storefront with a one-time code sent by SMS or WhatsApp, instead of (or as well as) an email and password. Configure it at Shop Settings > OTP Login.
Messages are sent through your provider account and billed to you. Ecomplify never sends OTP messages on your behalf.
Login methods
Three switches decide what customers see on your storefront login page:
- Email + password login — on by default
- Phone OTP login (SMS) — off by default
- WhatsApp OTP login — off by default
A channel only appears on your storefront when its switch is on and you've configured a provider that supports it.
If you turn email login off, your OTP provider must be working — otherwise nobody can sign in. The dashboard warns you and refuses to save if you disable email login without a provider configured.
Choosing a provider
| Provider | Channels | Notes |
|---|---|---|
| Twilio | SMS + WhatsApp | |
| MSG91 | SMS + WhatsApp | DLT template required for SMS to India |
| Meta WhatsApp Cloud API | WhatsApp only | Needs a Meta-approved authentication template |
| AWS SNS | SMS only | Use an IAM user limited to sns:Publish |
If you enable WhatsApp but pick an SMS-only provider (or vice versa), the dashboard warns you and that option simply stays hidden on your storefront.
Credentials
Each provider asks for different fields:
- Twilio — Account SID, Auth Token, optional Messaging Service SID, From Number (SMS), WhatsApp From Number. Numbers are in E.164 format, e.g.
+14155550100. - MSG91 — Auth Key, Sender ID, DLT Template ID, optional WhatsApp Integrated Number.
- Meta WhatsApp Cloud API — Phone Number ID, Access Token, Authentication Template Name.
- AWS SNS — Access Key ID, Secret Access Key, Region, optional Sender ID.
Secrets are masked as ******** after saving. Leaving the masked value alone keeps your stored secret.
Daily send cap
Daily OTP send cap limits how many OTP messages your store sends per day. The default is 500. This is cost protection — each message is billed to your provider account.
What customers experience
Once enabled, shoppers can sign in with a phone number and a 4-digit code:
- The code is valid for 10 minutes
- Resend becomes available after 55 seconds
- Each number may request 6 codes per 24 hours and make 10 attempts per 24 hours
- An anti-bot check is always required before a code is sent — this protects you from paying for junk messages
Signing in by phone also creates the account if the number is new to your store. See Customer Accounts & Login for the full shopper experience.
Global Markets
Sell in multiple currencies by mapping countries to separate shops. Configure at Shop Settings > Global Markets.
How it works
Each mapping is one country → one of your other shops. Picking the country fills in that country's currency automatically — you don't choose the currency separately.
When a customer visits from a mapped country, they're directed to the shop you mapped it to, and see that shop's currency.
Before you start
- You need more than one shop on your account. The shop dropdown only lists your other shops — a shop can never be mapped to itself.
- Each shop should already have the correct currency set in its own General settings.
Adding mappings
- Click Add Mapping.
- Pick a Country / Currency. The currency is shown below your choice.
- Pick the Shop that should serve that country.
- Repeat for other countries, then click Save Mappings.
Each country can only be mapped once. Saving fails with "Each country can only be mapped once" if you map the same country twice, and every row must have both a country and a shop selected.
Clear All empties the list on screen — you still have to click Save Mappings to store that change.
Staff & Permissions
Give team members access to your dashboard with per-section permissions. This is owner-only and has its own guide: Staff & Permissions.
SMTP / Email
Configure email delivery at Shop Settings > SMTP/Email.
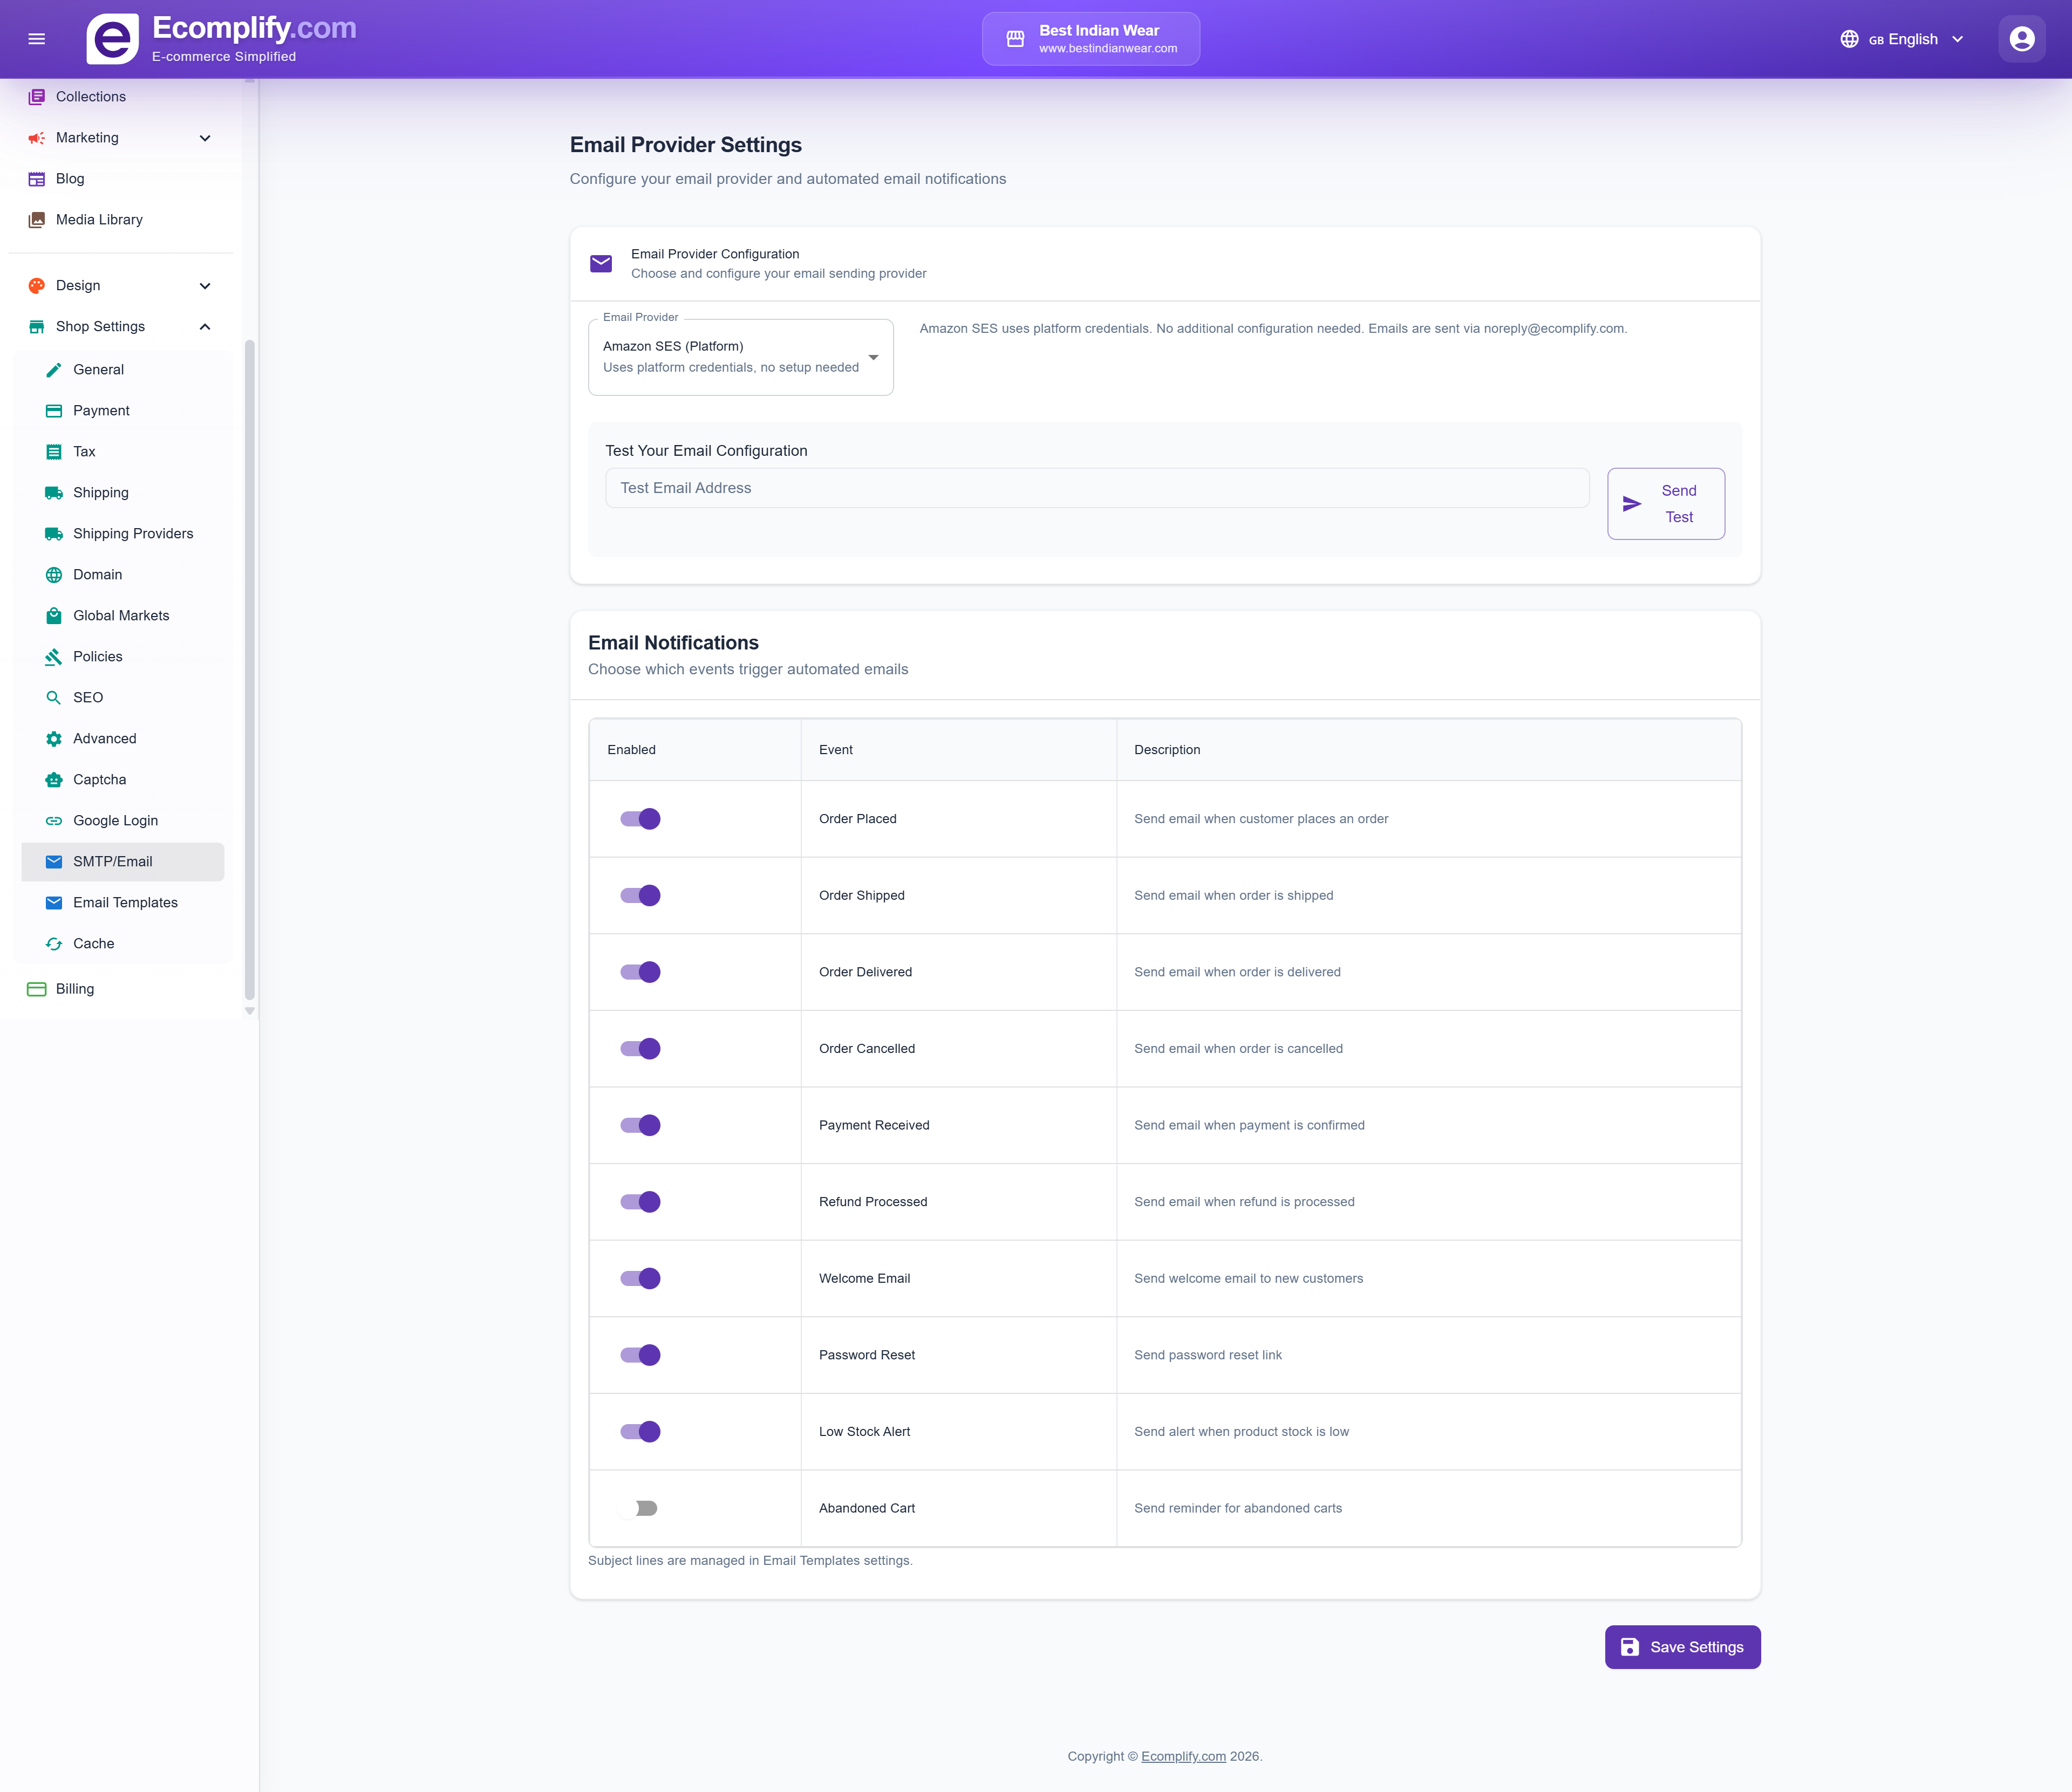
Set up your SMTP server for transactional emails:
- SMTP host and port
- Authentication credentials
- From address
- Test email functionality
Email Templates
Customize email templates at Shop Settings > Email Templates.
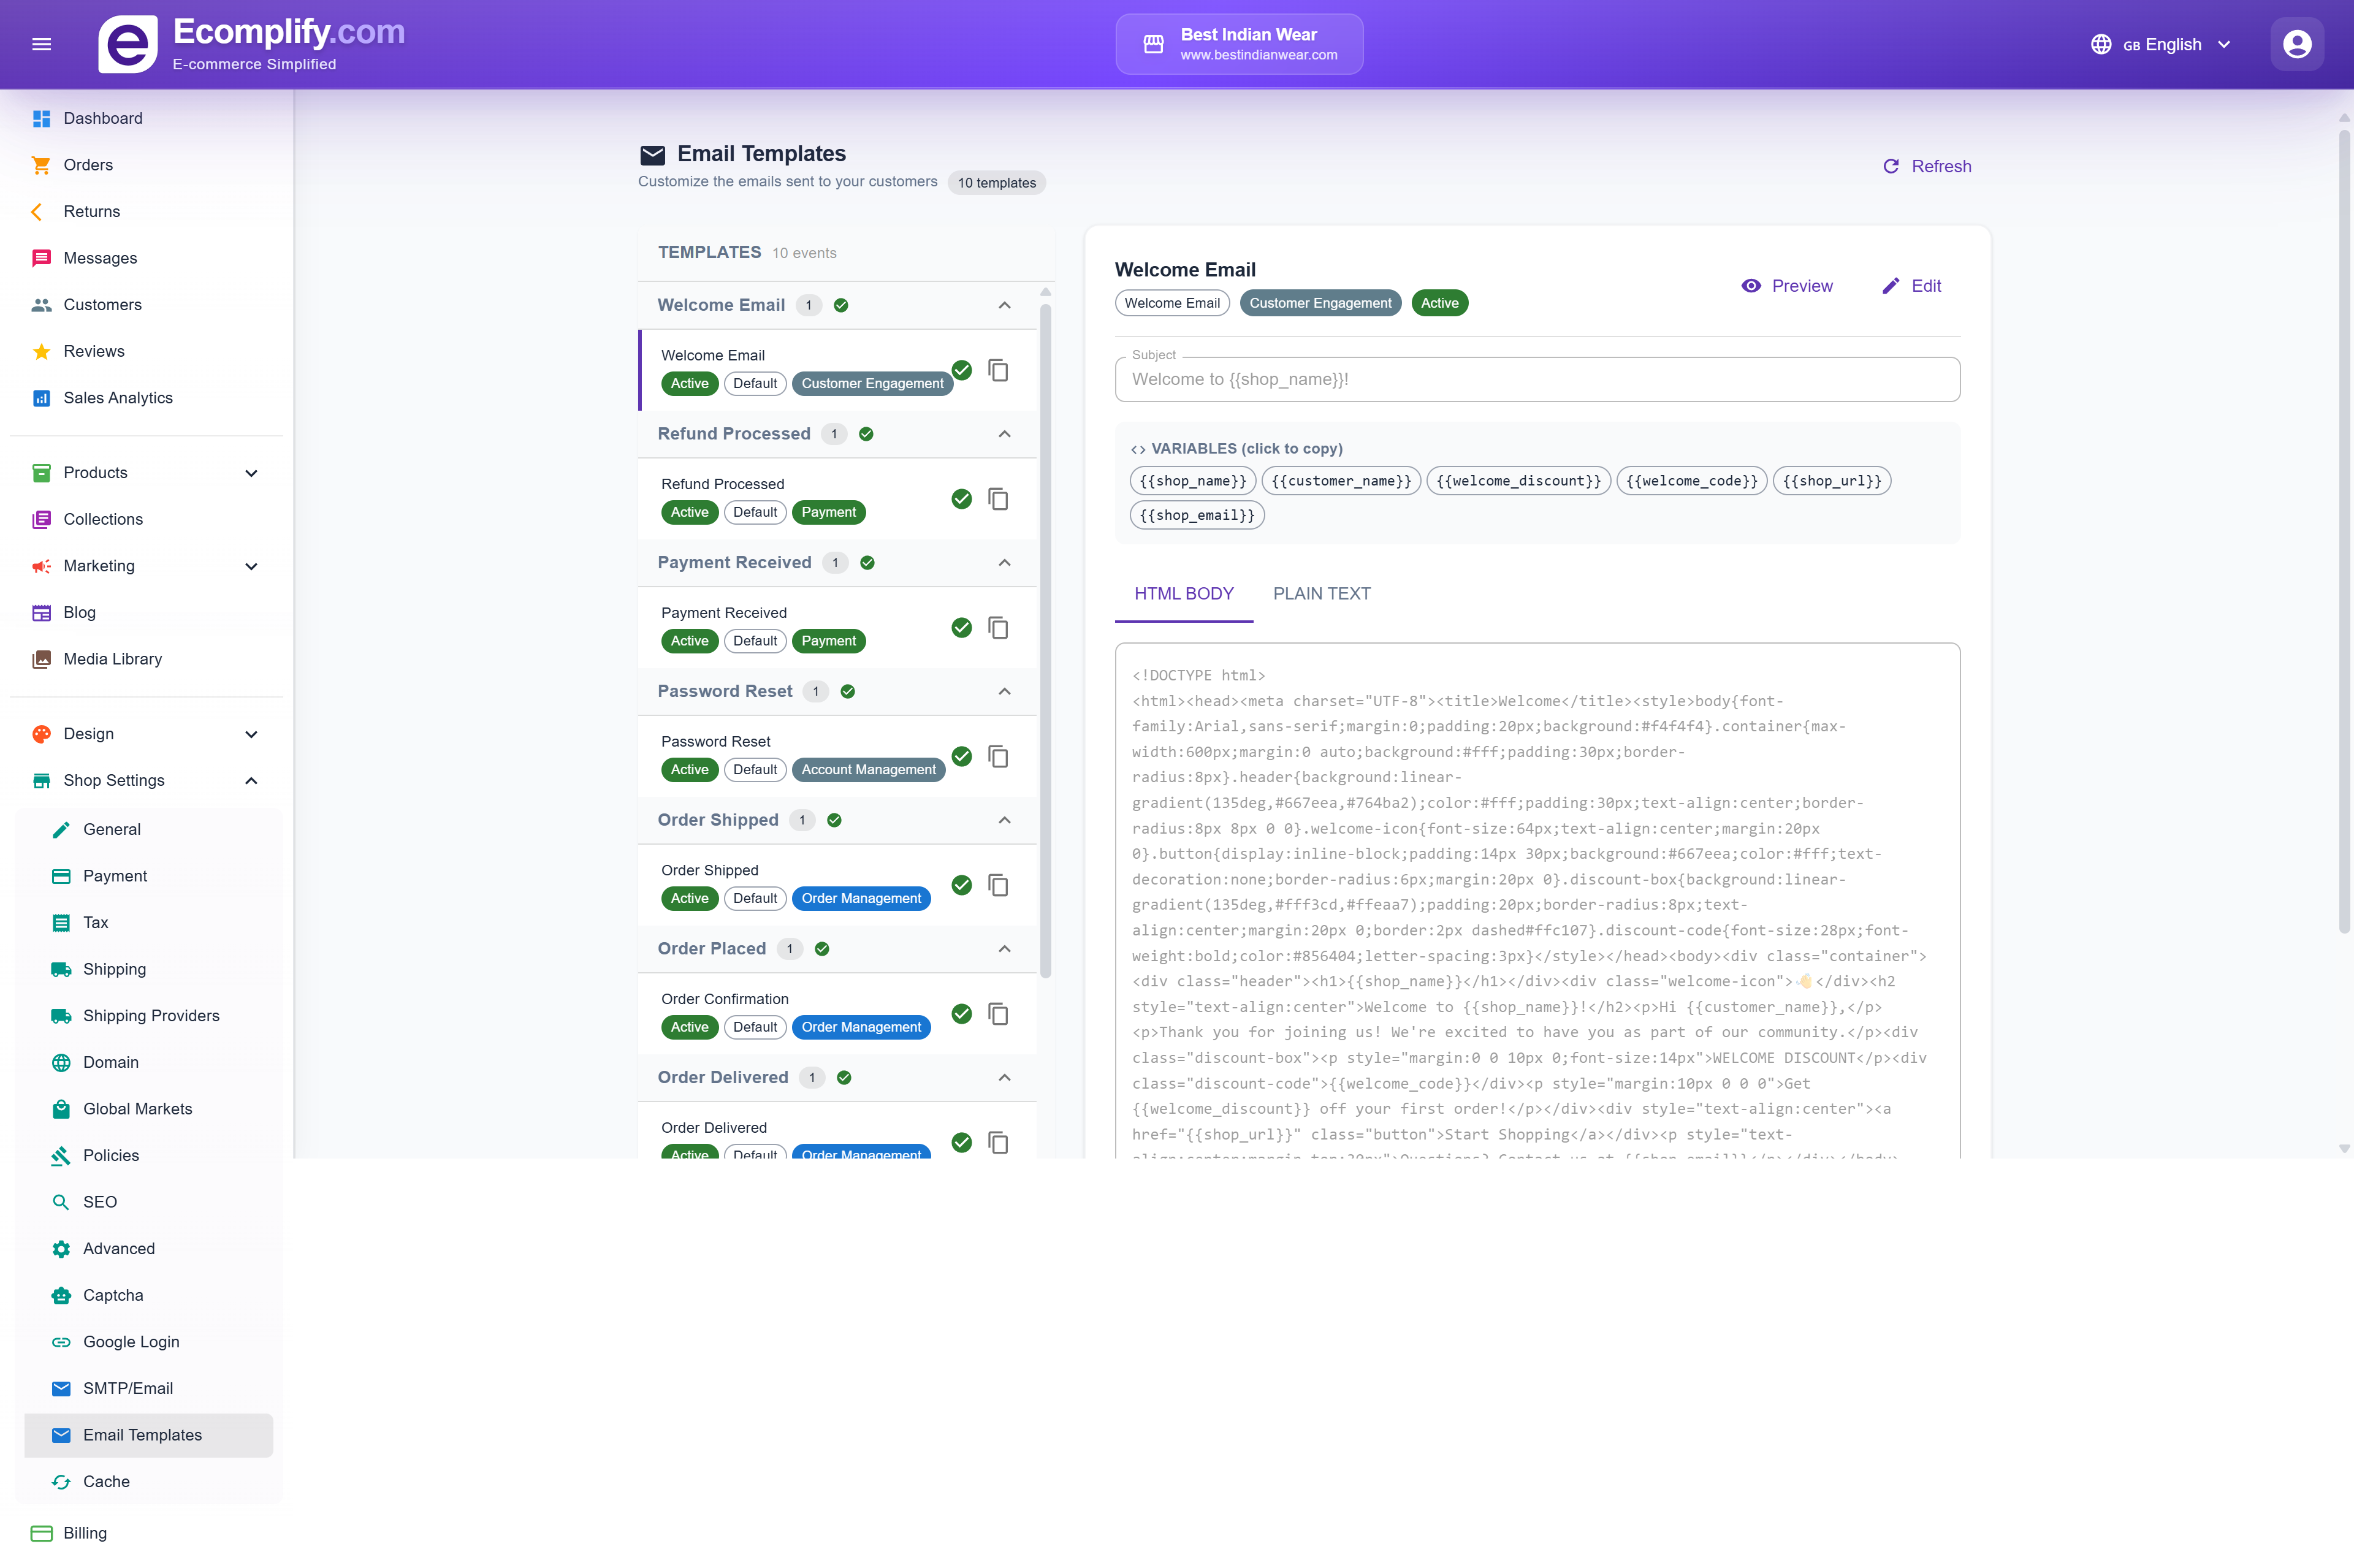
Edit templates for:
- Order confirmation
- Shipping notification
- Return/refund confirmation
- Welcome emails
- Password reset
Each template supports variables for dynamic content insertion.
Cache Management
Manage caching at Shop Settings > Cache.
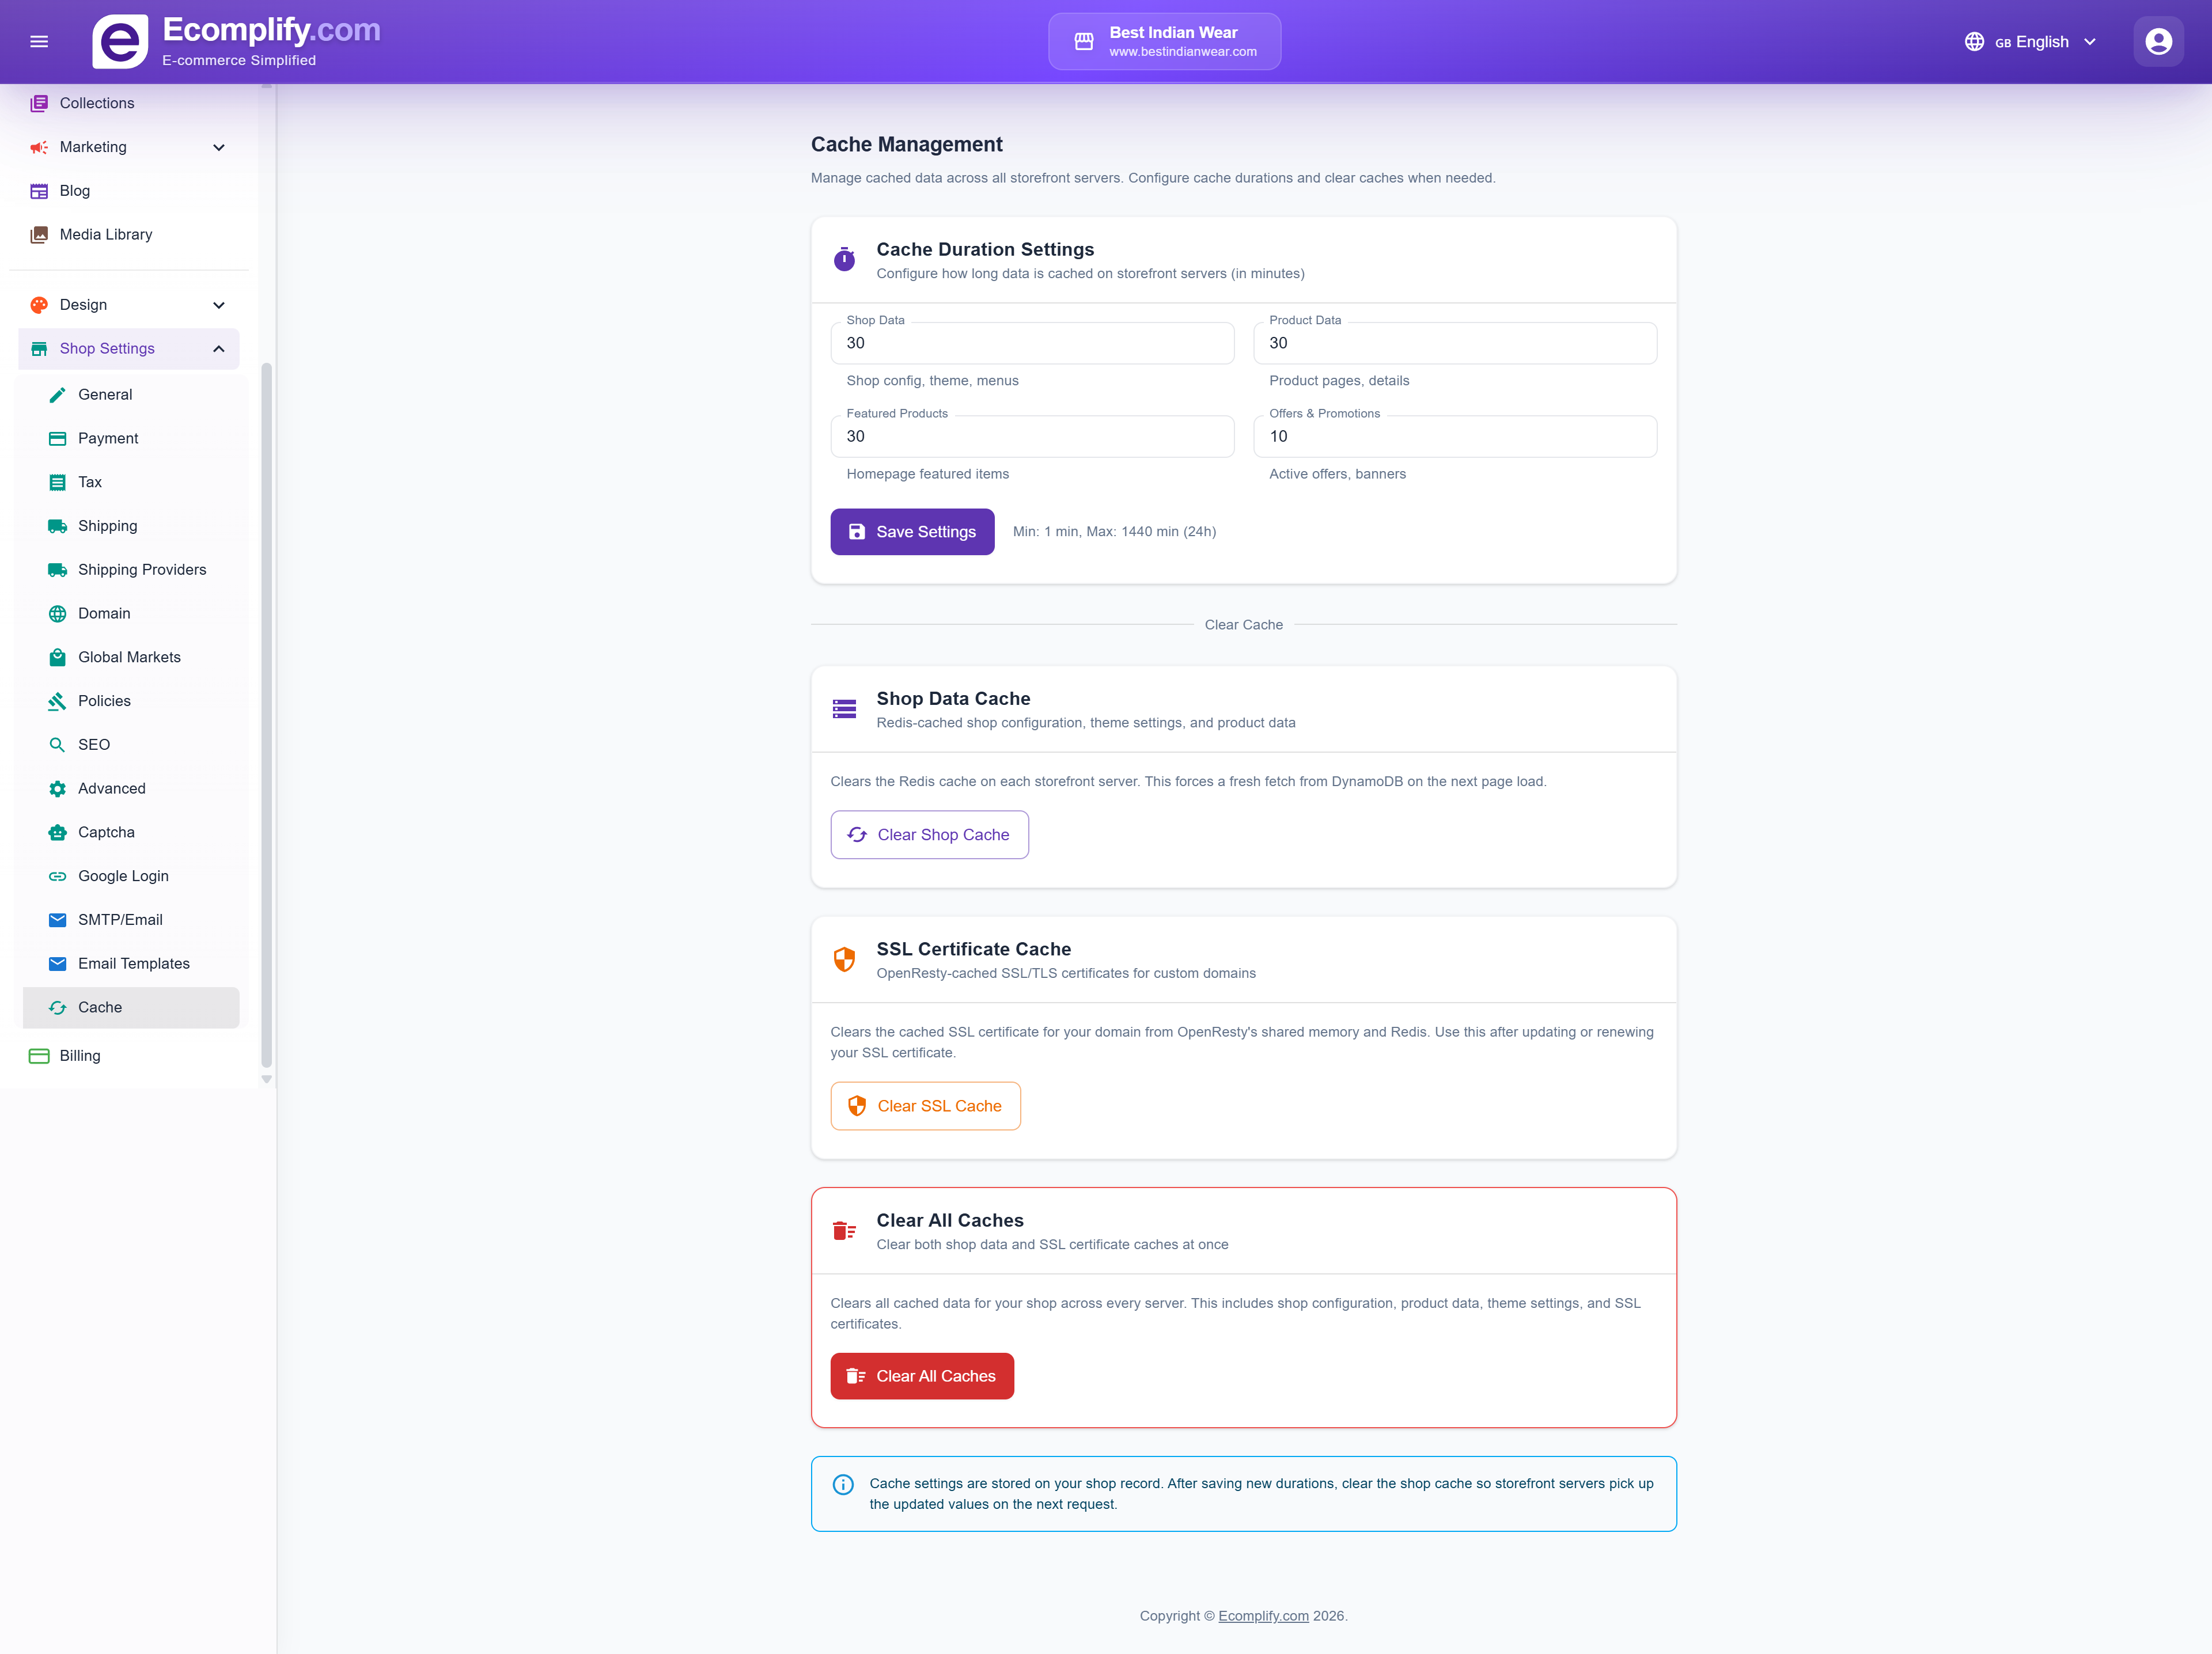
- Clear homepage cache
- Invalidate specific caches
- Manage cache settings for optimal performance
Billing
Manage your subscription plan at Billing.
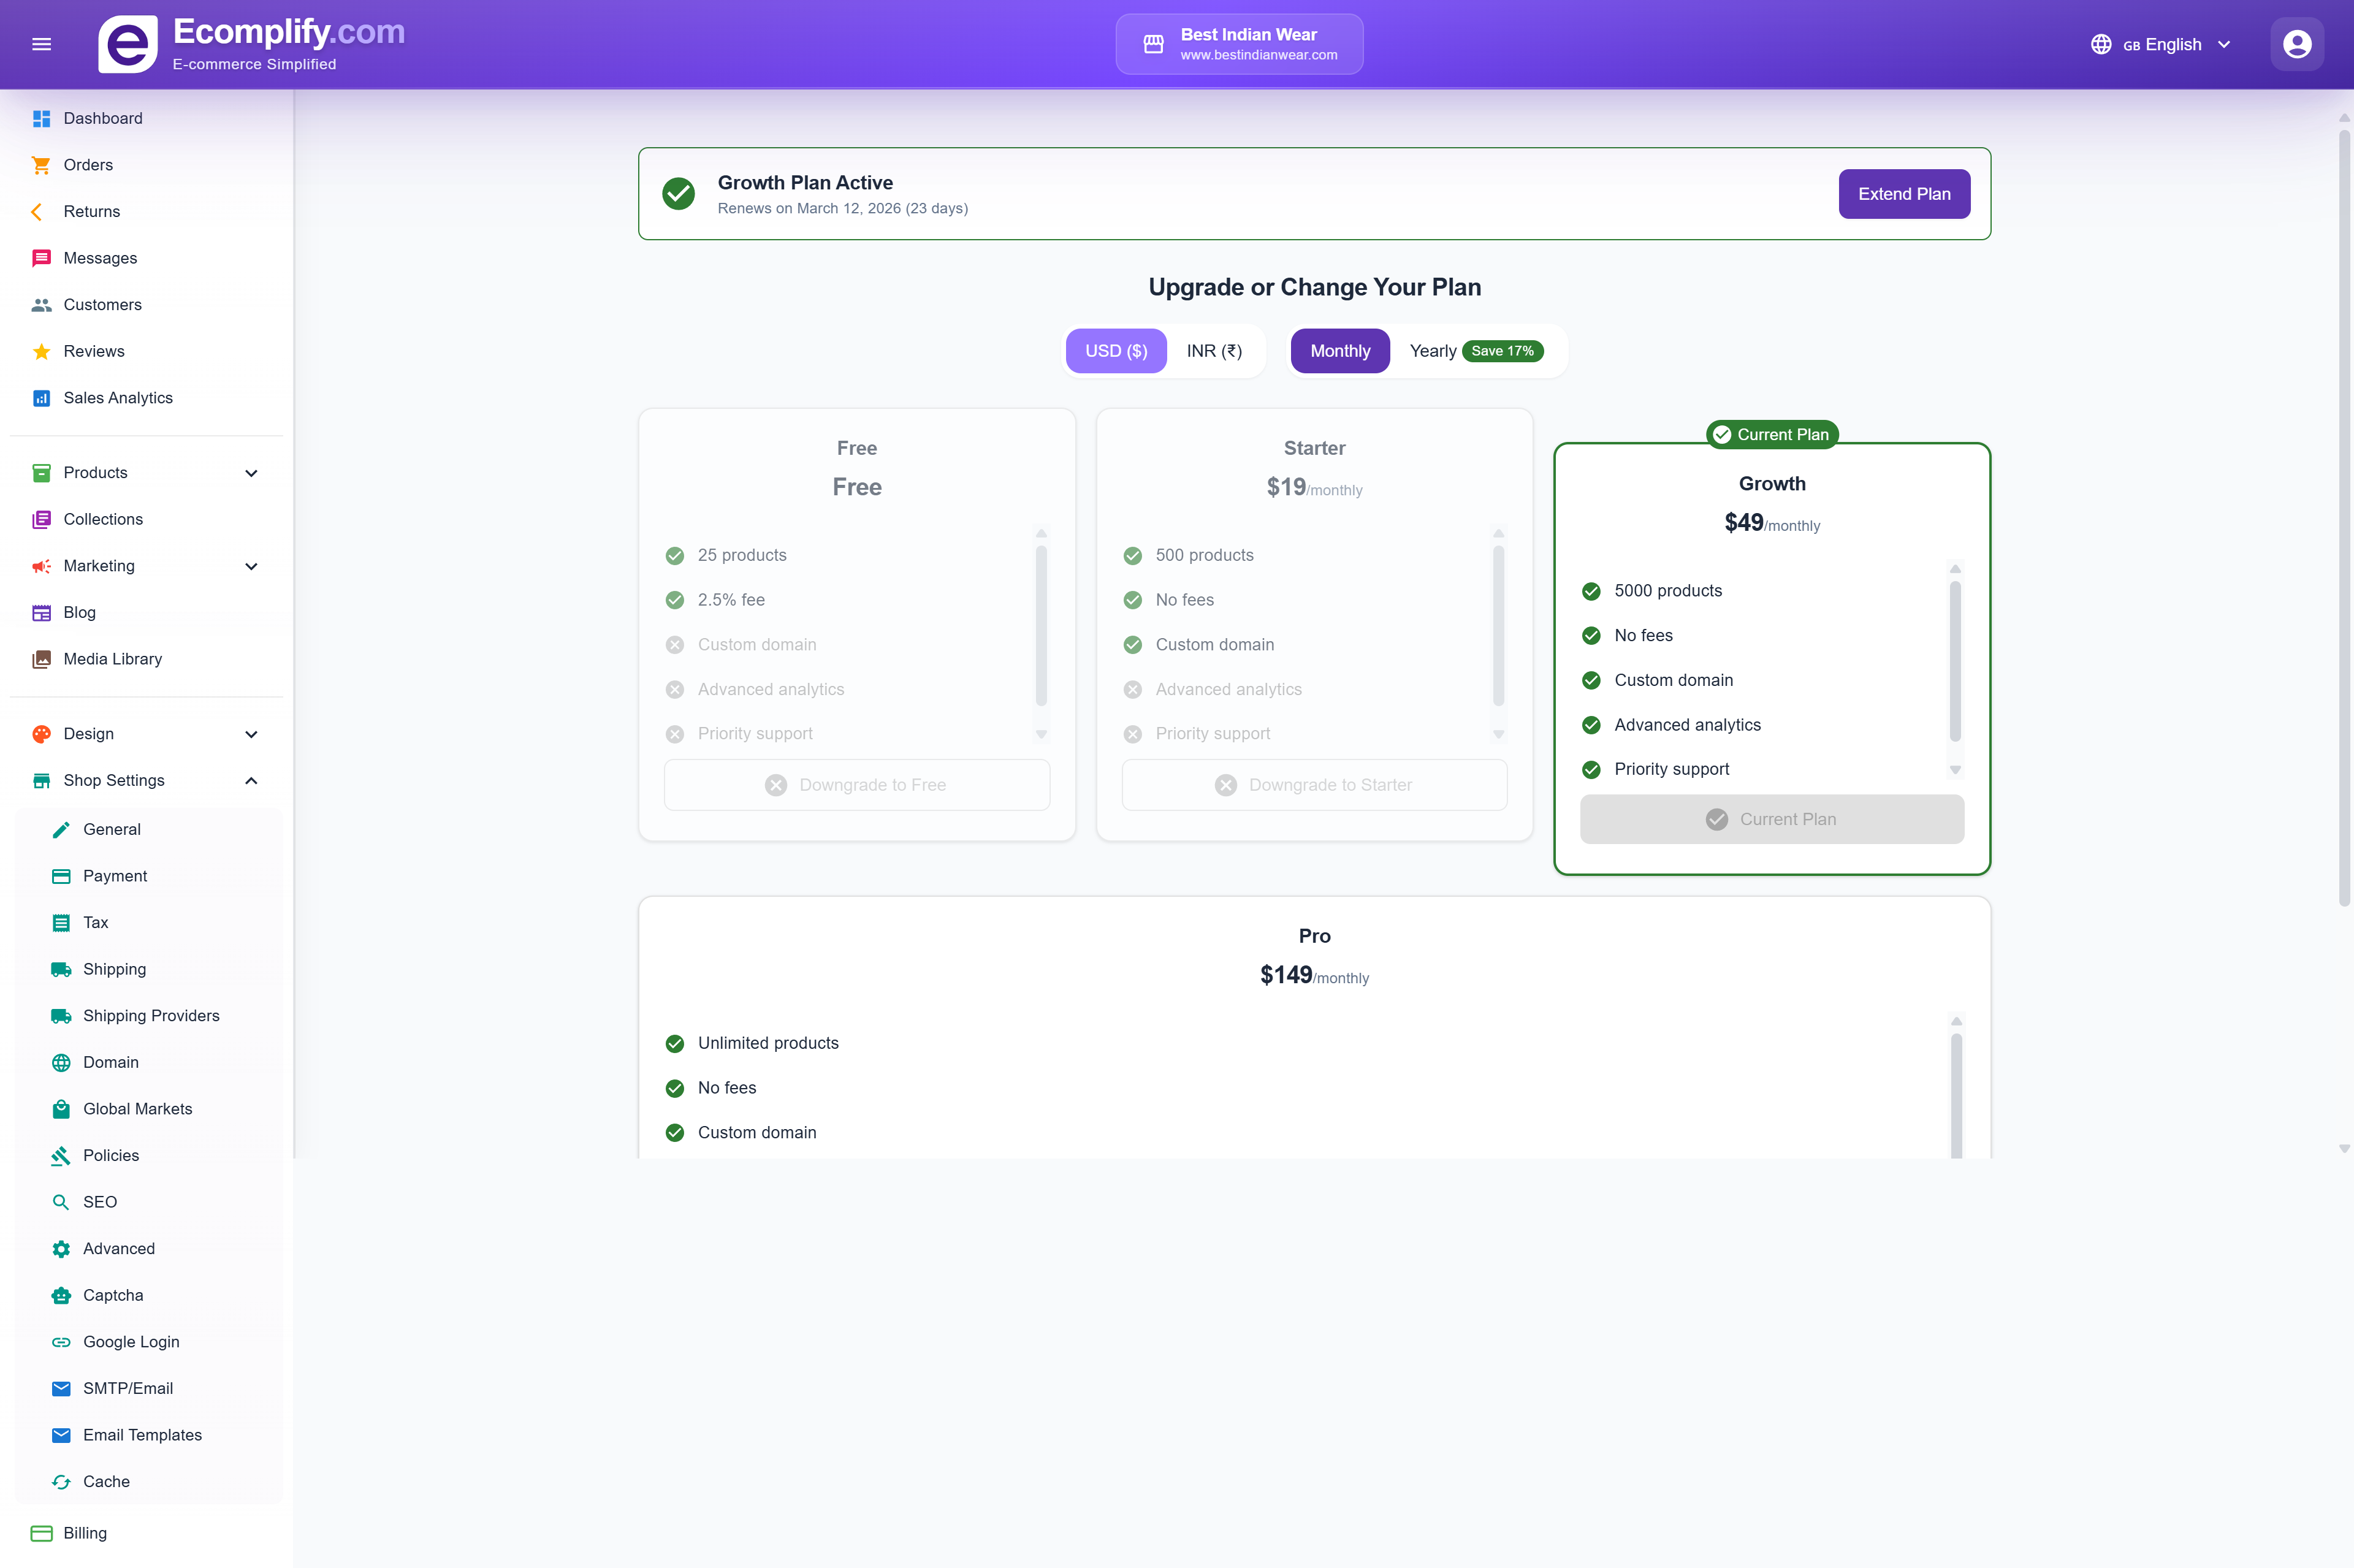
Available Plans
| Plan | Price | Products | Key Features |
|---|---|---|---|
| Free | Free | 25 | Basic features, 2.5% transaction fee |
| Starter | $19/mo | 500 | No fees, custom domain |
| Growth | $49/mo | 5,000 | Advanced analytics, priority support |
| Pro | $149/mo | Unlimited | All features, no fees |
- View your current plan and renewal date
- Switch between monthly and yearly billing (save 17% with yearly)
- Toggle between USD and INR pricing
- Upgrade or downgrade your plan
- Extend your current plan